The art world (which includes photography, by the way!) has a language of its own that those who are not part of this community might misinterpret. My favorite one is “negative space”. I have heard this phrase many times and wondered what it really was. Was it good to have in an image? After all, the word negative has, well, negative connotations! So it must not be a good thing, right?
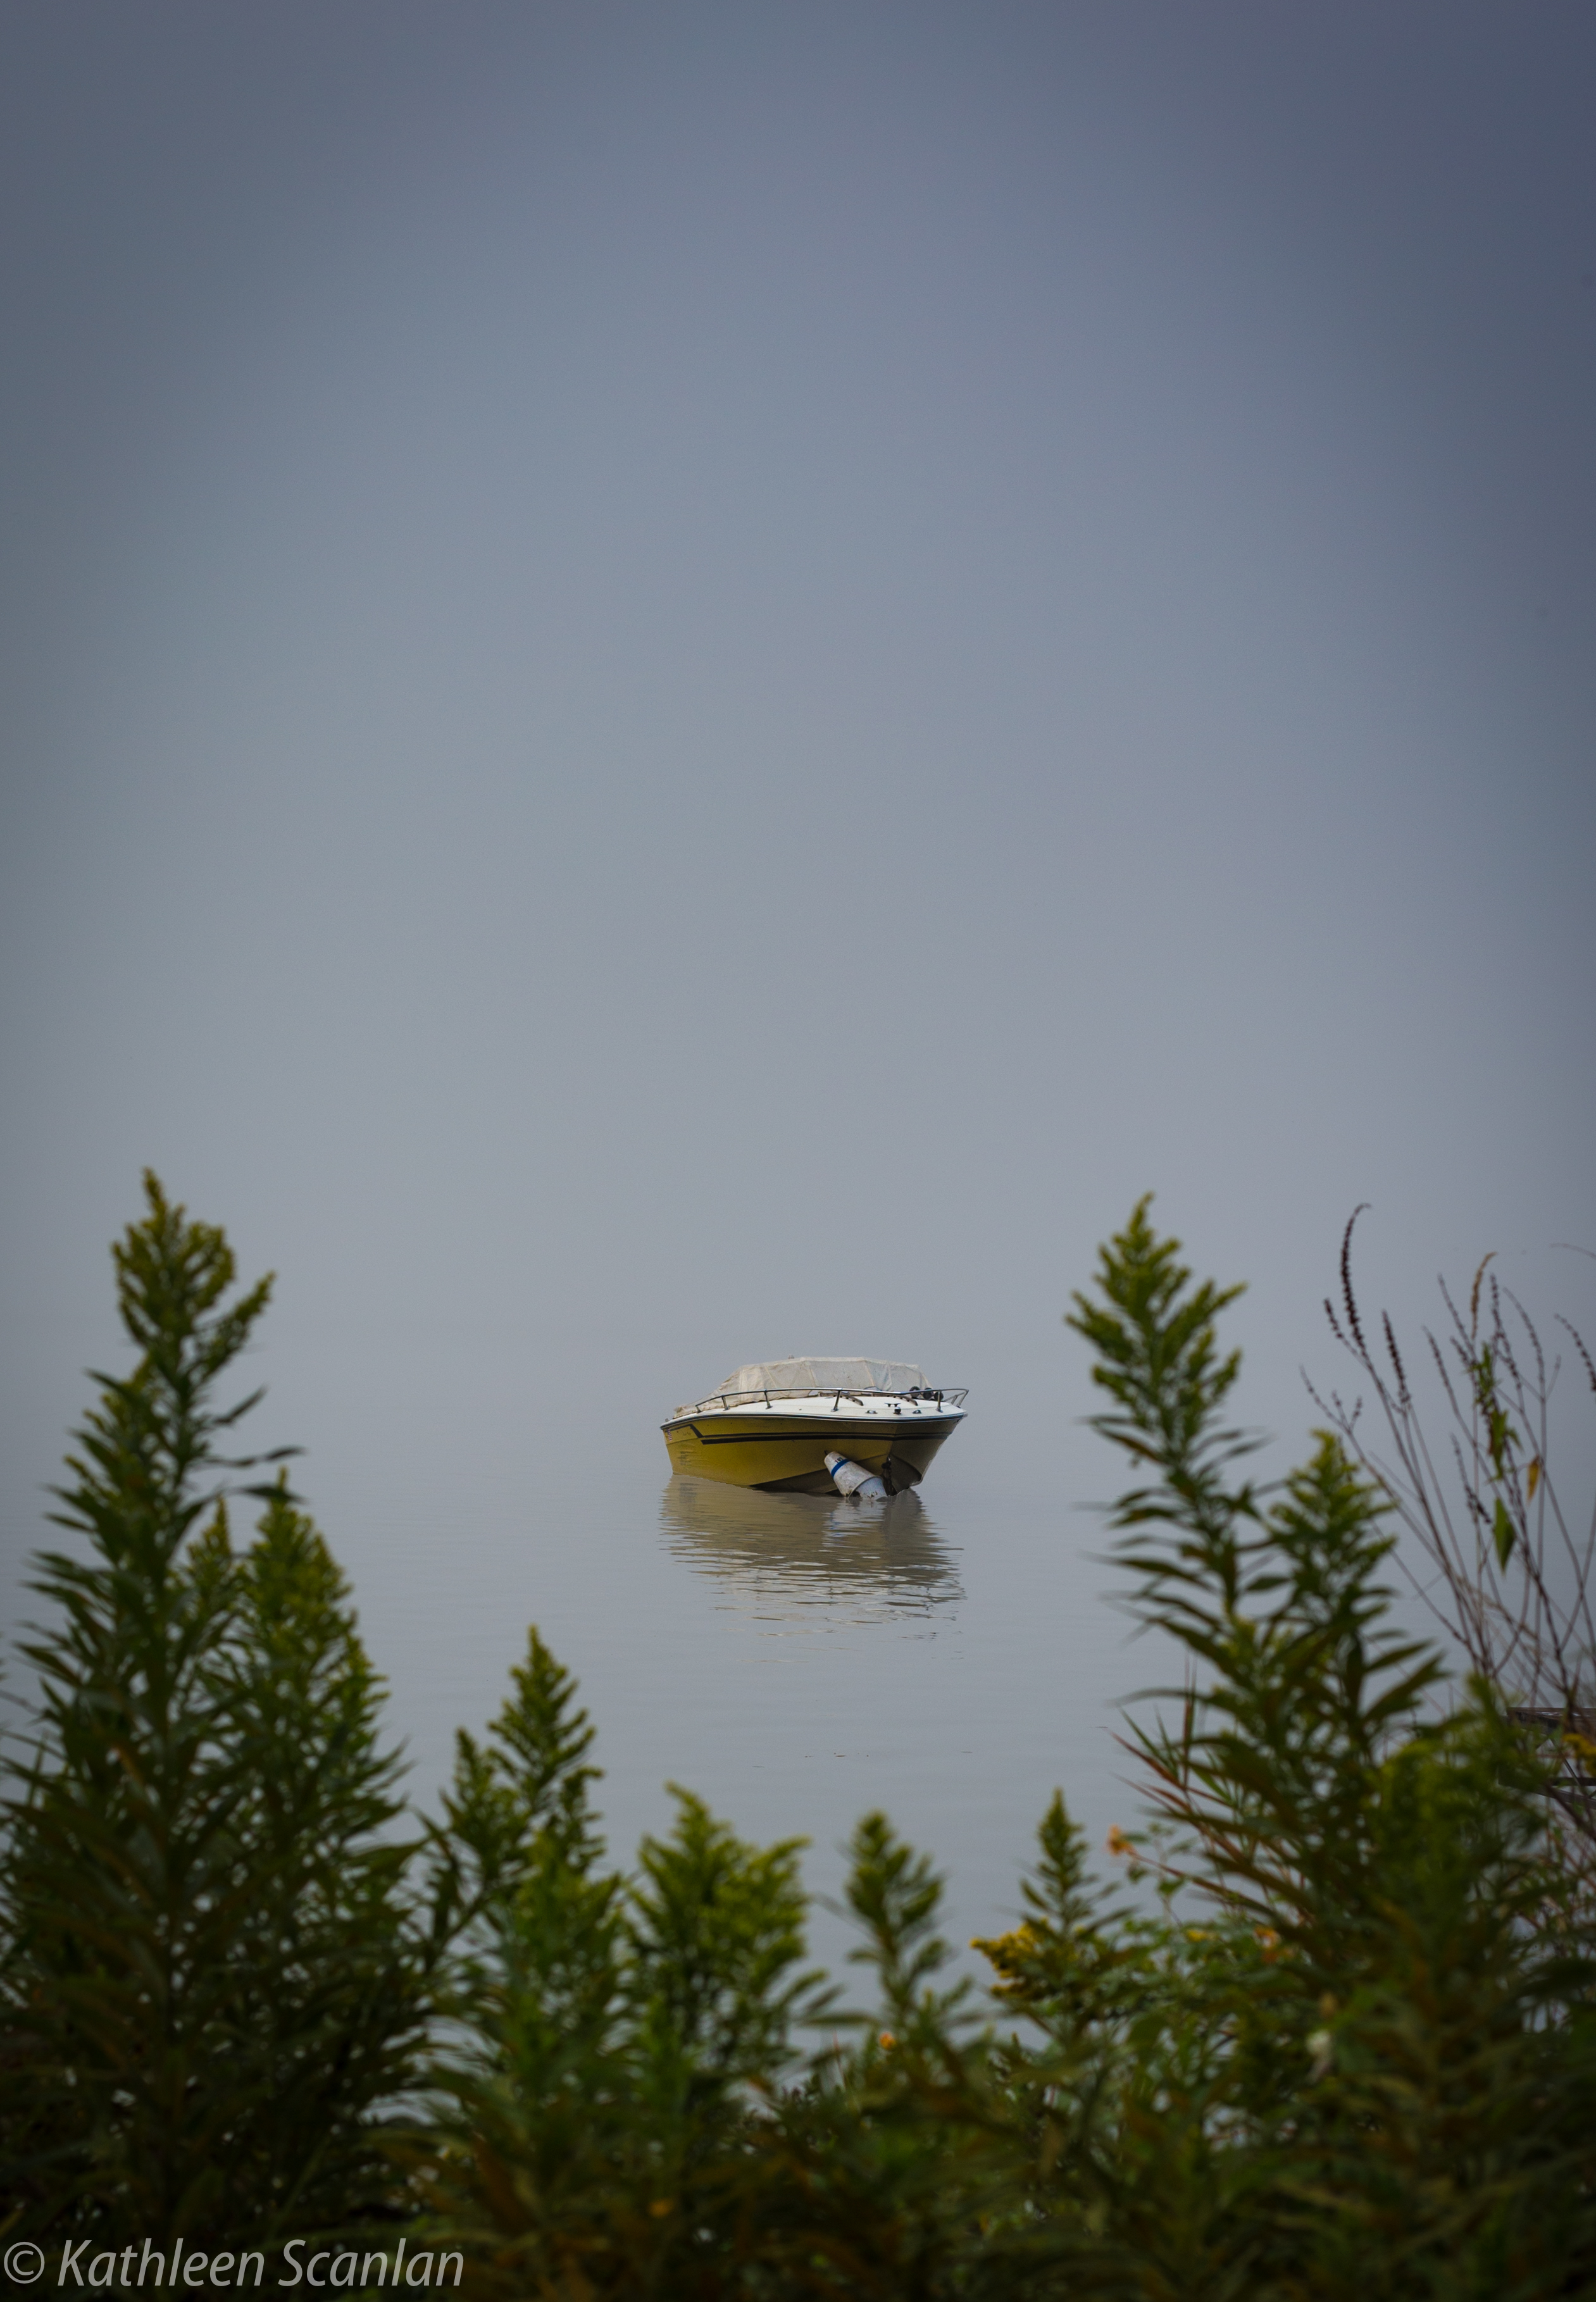
Well, not exactly. This term actually can be a very good thing. To explain it simply, the phrase is interchangeable with “uncluttered” or “open space”. The image below is one that has negative space. It was shot early on a foggy morning when the other side of the lake was so bogged down with fog, it looked like the lonely boat was floating on air. I used the bushes along the shoreline to anchor the bottom corners (and I like that “window” look as if the viewer is peering into the frame). The emptiness from around midpoint to the top of the frame is considered negative space.
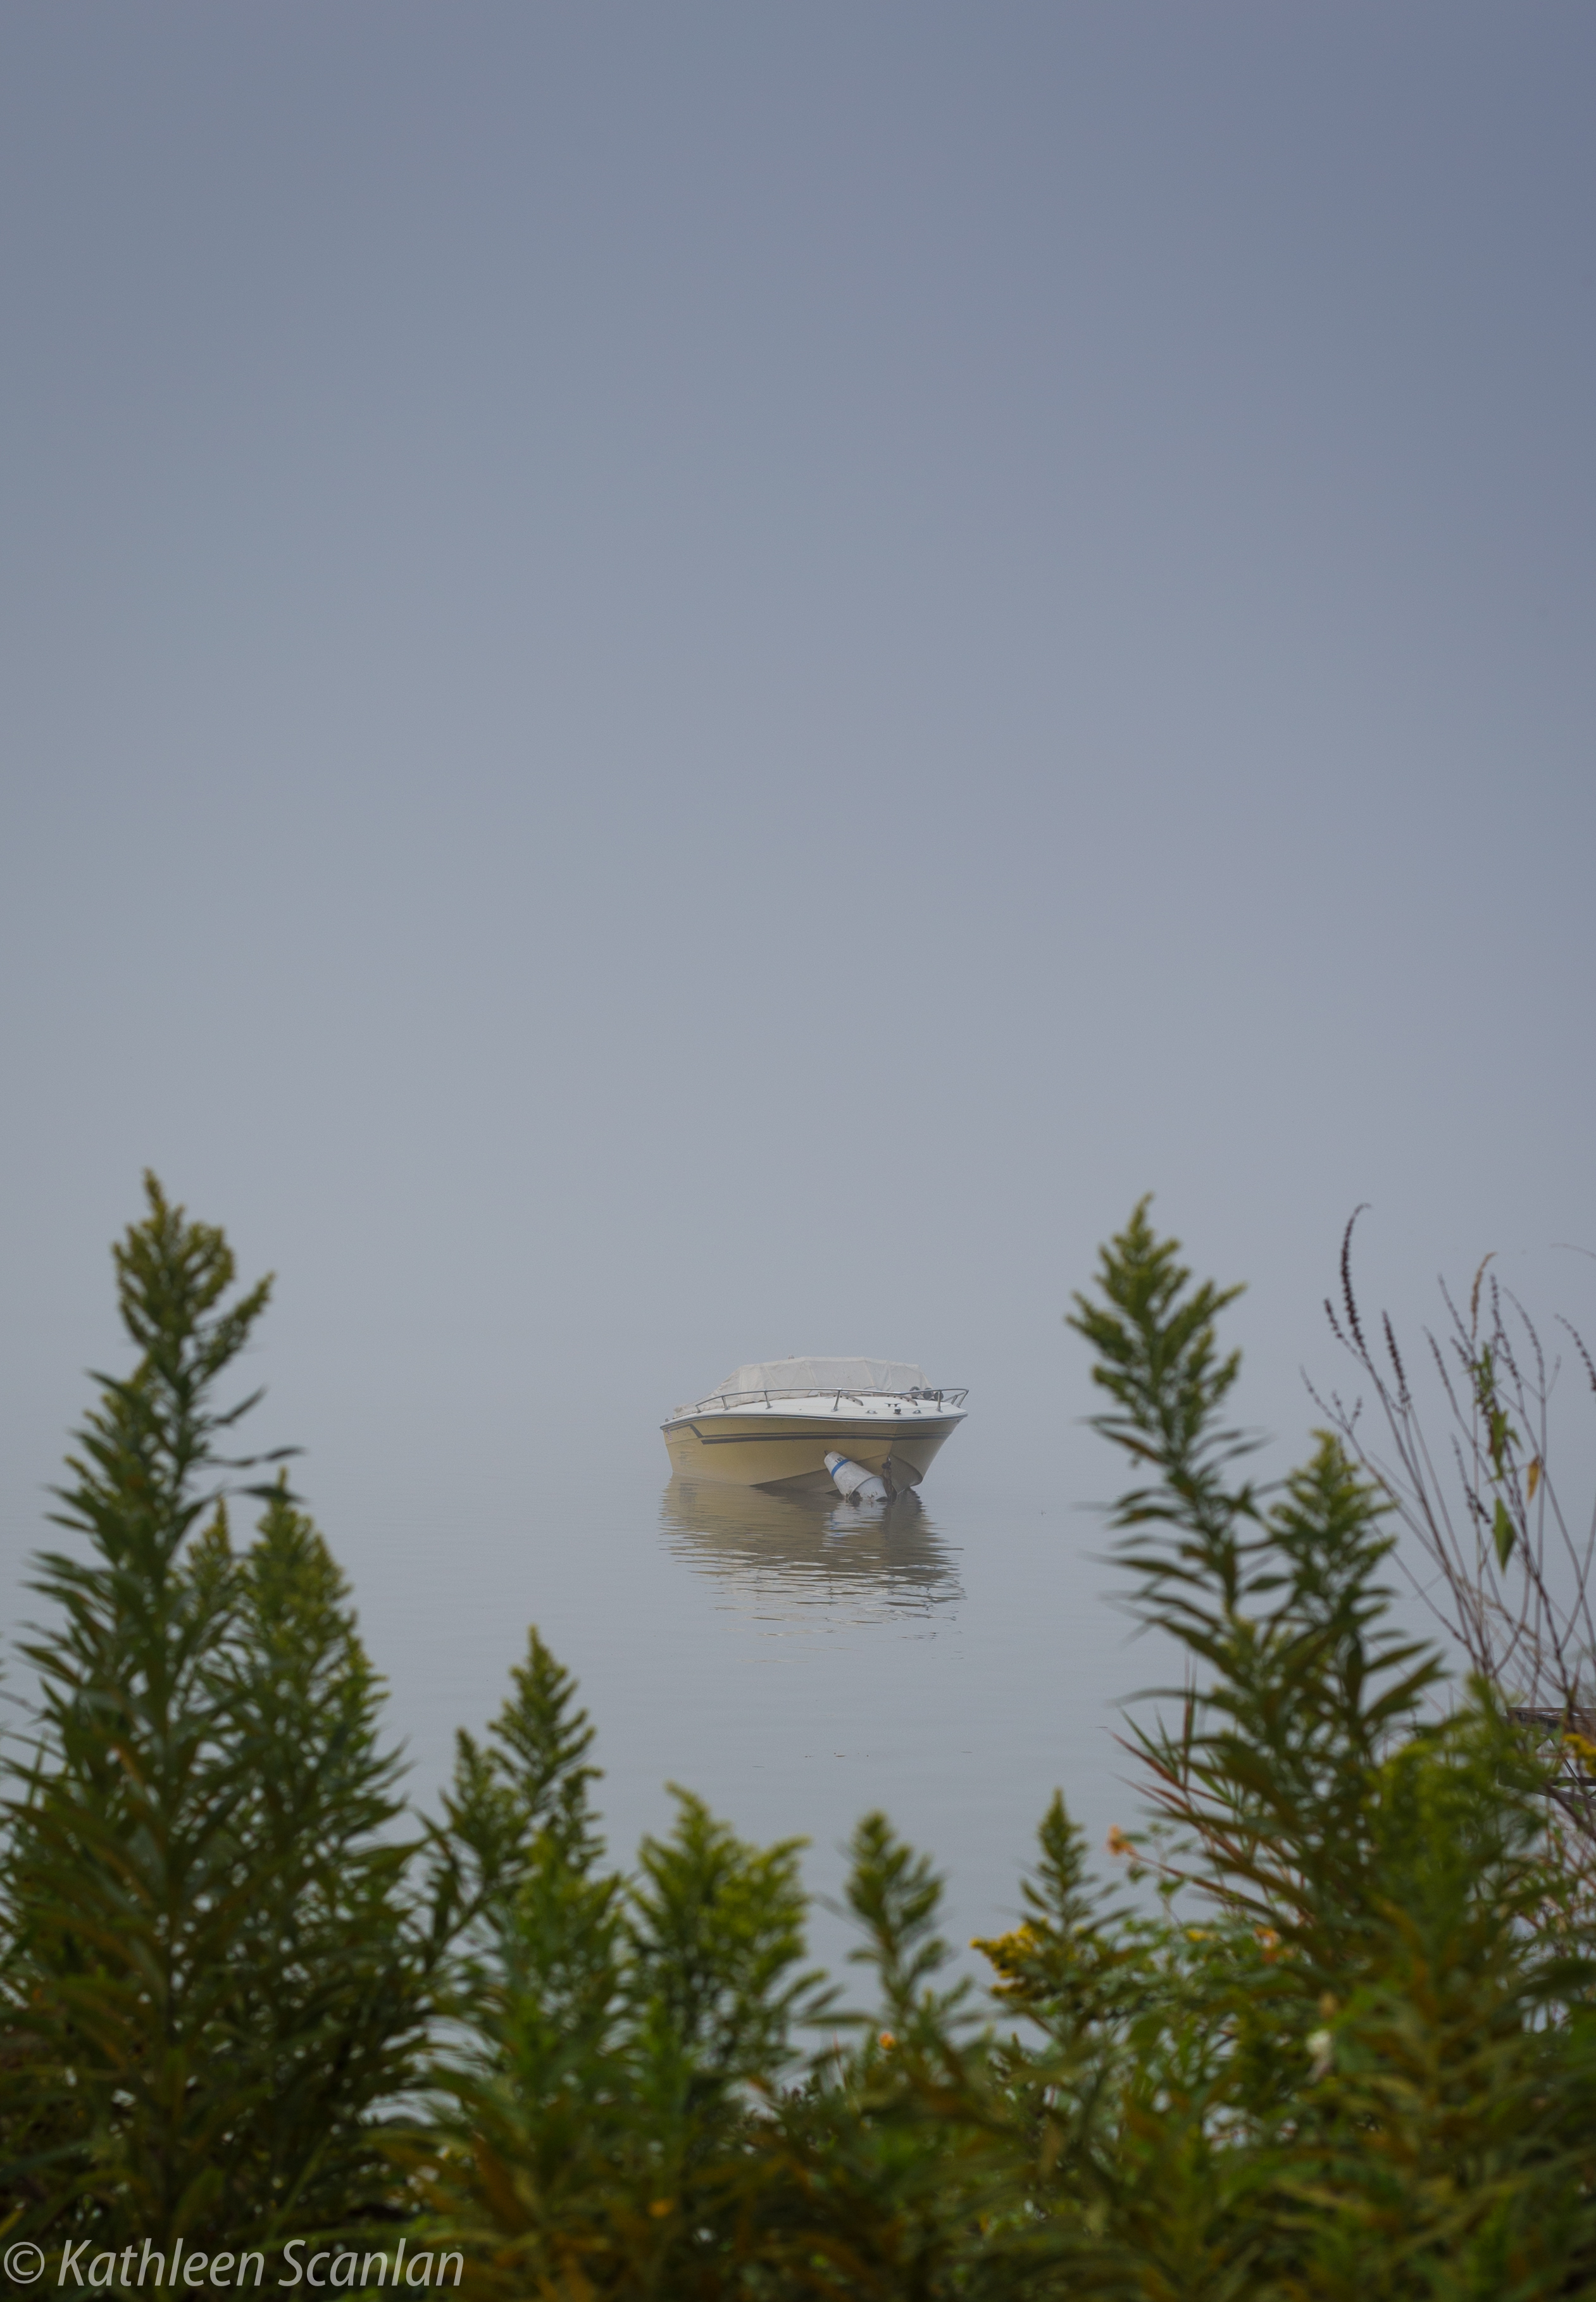
Early morning fog on Lake Como in the summer
Why have empty or negative space in a shot? There are several reasons that I can think of to have it in the frame. The first one is obvious. It focuses the eye on the main object, which in this case is the boat. Another one could be that I may want to add text to the image. Or maybe, even change the background in post work.
My settings on my Canon 6D were: ISO 200, 50mm primary lens (meaning it was not a zoom), f/7.1 (Aperture), and Shutter speed of 1/100 sec. I did not use a lens filter although one would have cleared up the haze in the image. You can see that the fog/haze tends to soften the boat and makes it slightly indistinct. But, since I knew I had a program that allowed me control over how much of the fog/haze I wanted to remove, I decided to go filter-free.
I use Lightroom 5CC by Adobe when I download and backup my images. It affords me the opportunity to slightly change things and still have all the data filed together without creating a large file when I save those changes. The image below is the same image as above, only with some slight post work.
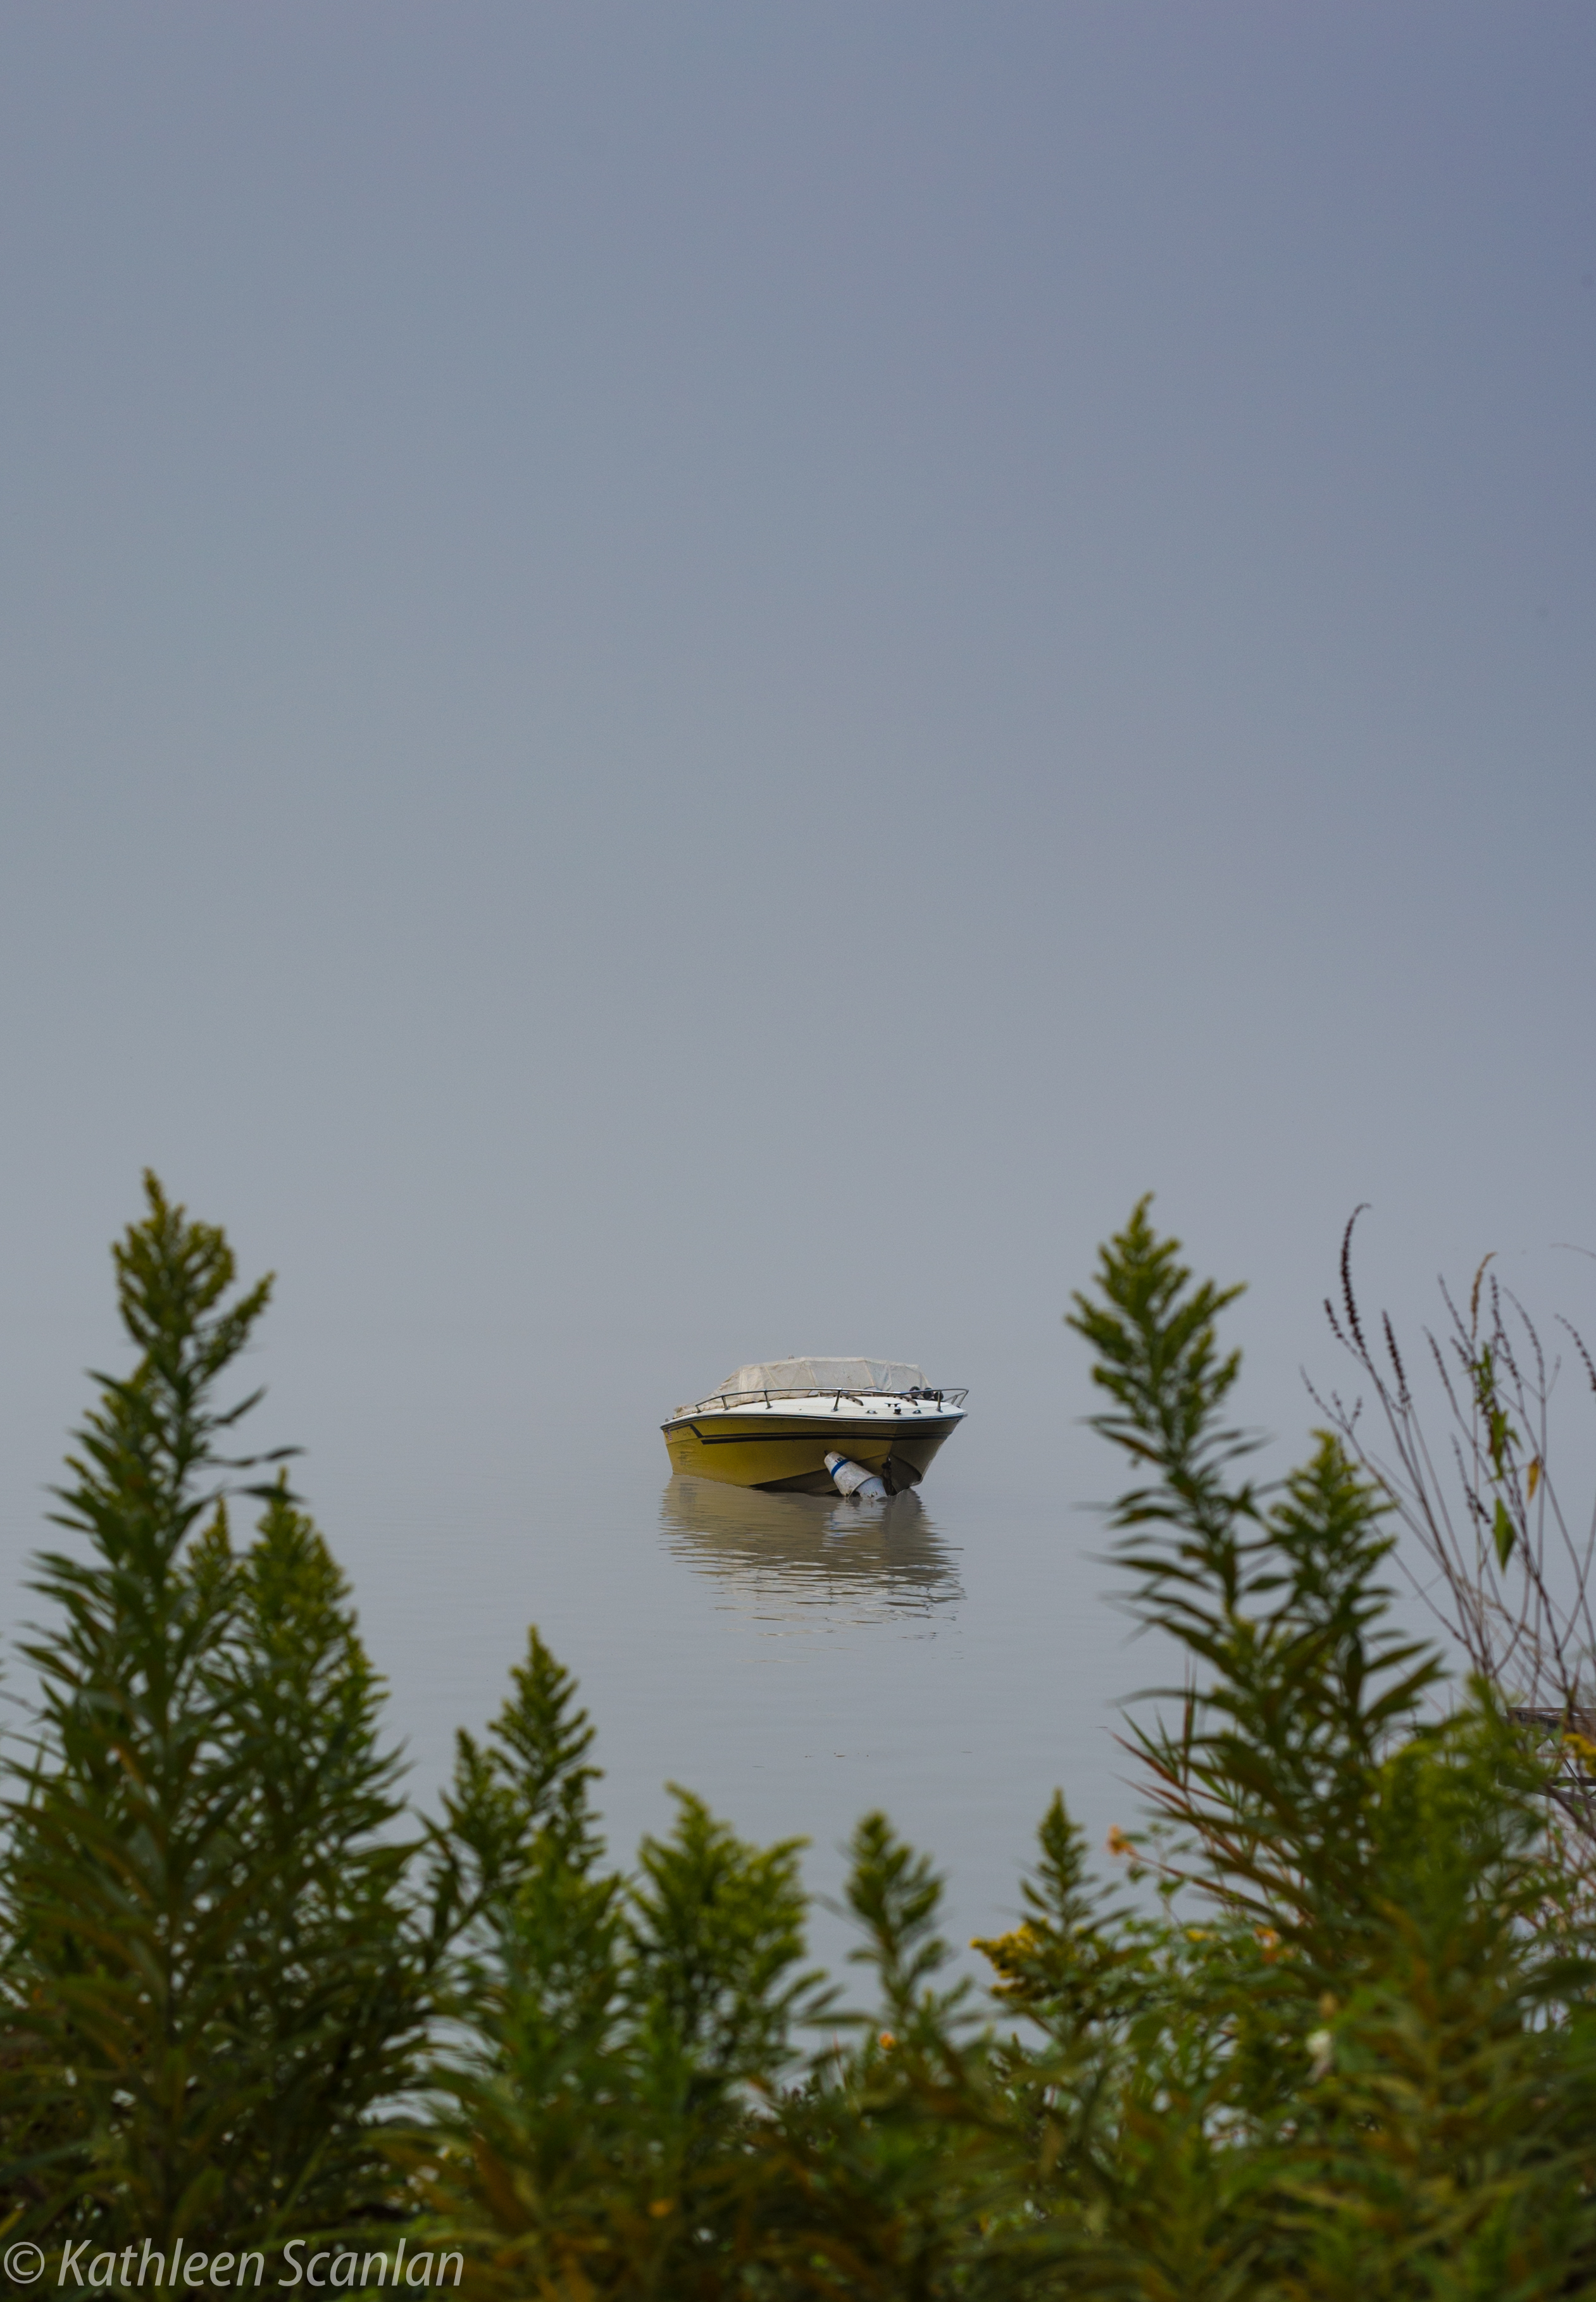
Added some post work
In Lightroom, I used the “dehaze” tool located under the tab “Effects” to clear up a little bit of the fog so the boat would stand out a bit more. It deepened the color and shadows of the bushes along the shore. After completing that, I used a brush to clarify (another way to bring out detail and add a bit more definition) and increase color saturation to the boat. The background and foreground were not affected.
The two last images show what you can do with negative space. Again, all my initial work was completed in Lightroom. I tend to add vignetting to my images to tighten the viewing area a bit. For me, it looks better having the fog “contained” inside the image. But you might not. It really is up to you. The second image has added text that I completed in Photoshop.
A little vignetting and the fog is contained!
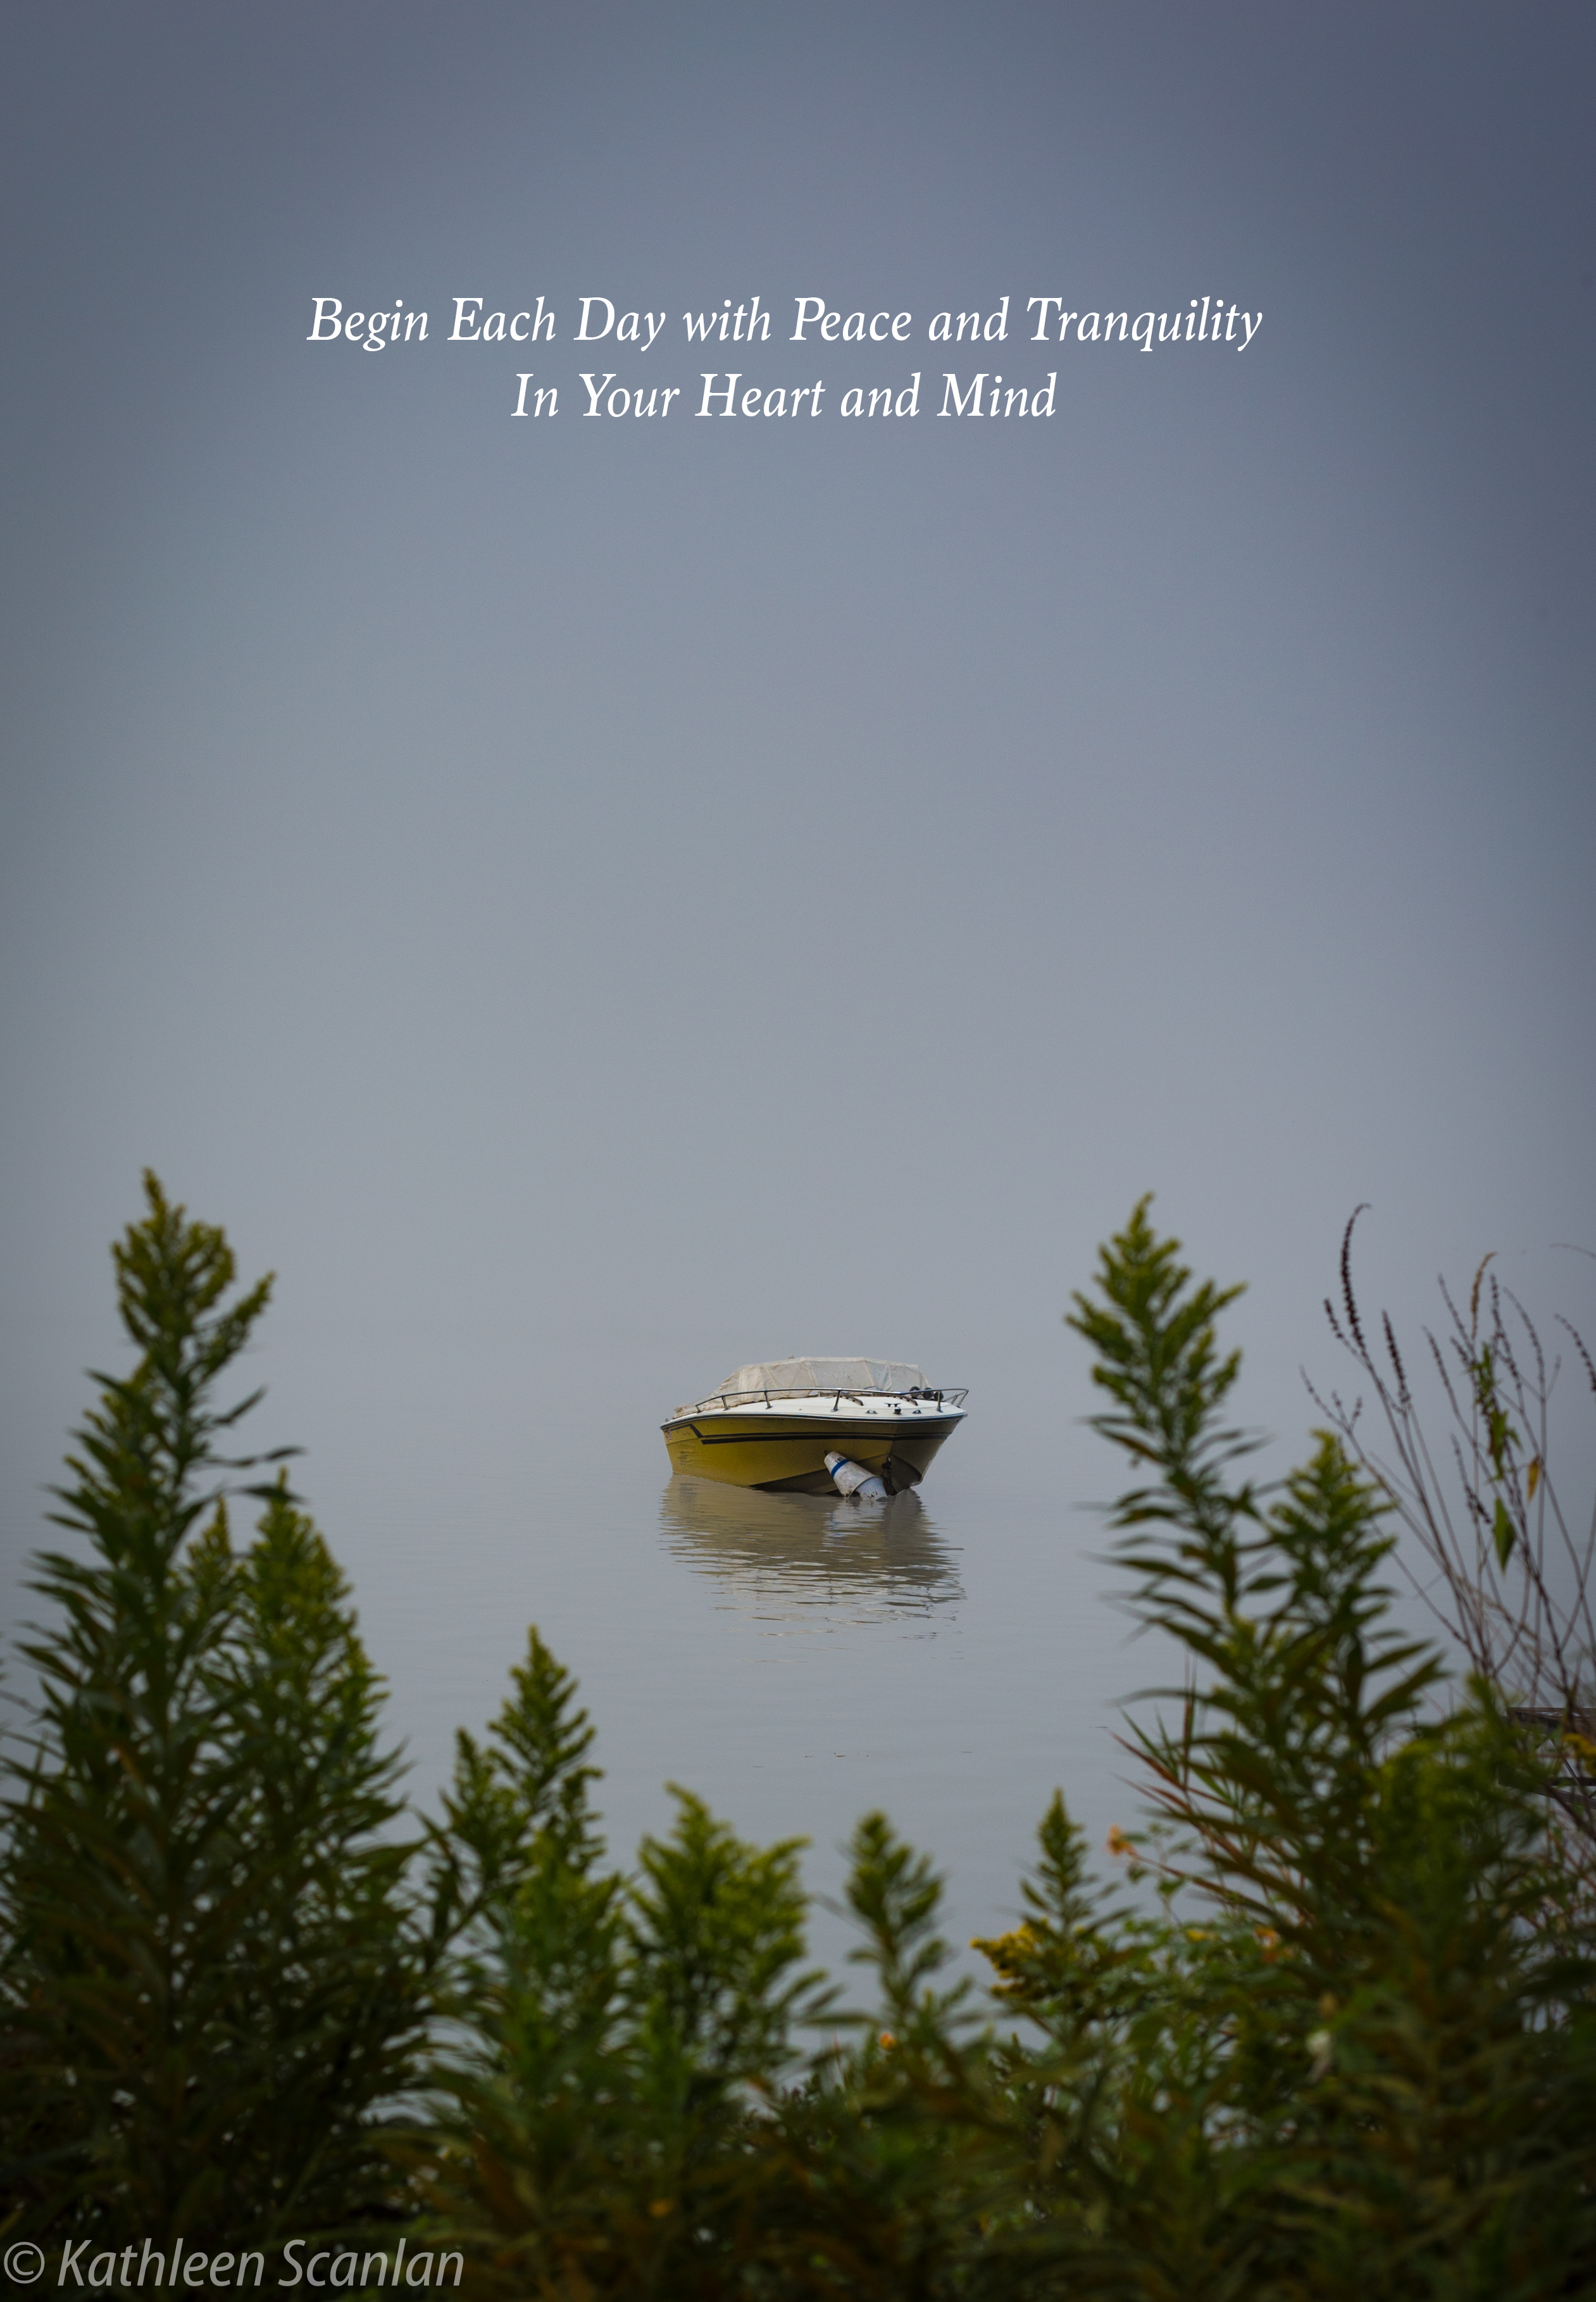
The final product!
This is just one example of negative space and what you can do with it. A shot of a leaf on a sidewalk, an object on an empty table, or a person walking down a wide, lonely road. Negative space can be created in many different ways with just as many different results.
What would you do with it? Take a picture of a child blowing out a candle with the background completely darkened and only her face, cake and candle visible? a couple of children (or even just one all alone) playing in the sand on a beach with no one else around? An apple on a wooden table at eye level in an orchard, with the orchard itself deep in the background and out of focus? Get your creative juices flowing and give it a try.
So, the next time you take out your camera, consider adding negative space in your images. Keep your composition clean and clear. You might find that you like the uncluttered look!