• KES Collections
  • About

KES Photography

~ Photographic Techniques Simplified

KES Photography

Category Archives: Photography

Image

Is it Real or Post Work?

25 Wednesday Oct 2017

Tags

creativity, images, photo work, Photography, post-work, programs, pure photography

There is quite a conversation going on around the internet regarding photography and “pure” photography. Strange, but I never thought of it that way, even back in the “film” days. But apparently, with the onslaught of programs that help to enhance the original image from the camera, (some cameras have built in programs for that), the cosmic question has become “which is better? Pure photography (downloading and accepting whatever the camera captures, good or bad)? Or, images that have been adjusted in post work programs?  To me, the better question is; what is it that you want to accomplish with your image?

My favorite photographer is Ansel Adams.  You can still see his landscape photography everywhere.  He is known for capturing the landmarks and landscapes of the United States and is emulated by photographers worldwide.  Those who really don’t know him, believe his images are simply what he captured in camera.  The reality is, he did his best work in the darkroom.  Mr. Adams knew what he wanted his final products to look like and worked on his images until they reflected his “vision”.  His work, comprising of the National Parks of the United States, still capture the essence of the forests, rock formations, and the American landscape to this day.

I have read blogs as well as discussions on Facebook and other areas of the internet regarding this issue and people on both sides of the fence are very determined to convince each other that they are right. Just like politics…  I too would love to shoot a picture and have the camera do all the work for me (provided the camera knows exactly what I am striving for in the final product).  There are times when it is spot on but more times than not, the camera catches a dark area that my eye did not “see” or a glare which could have been be caused by the sun hitting the lens.  Or it reads the light as being too bright behind the subject matter because it registers all the light coming into the lens and adjusts for it, and the subject matter becomes a “shadow” in the image and the sky or background come out perfect with beautiful blue and white skies.

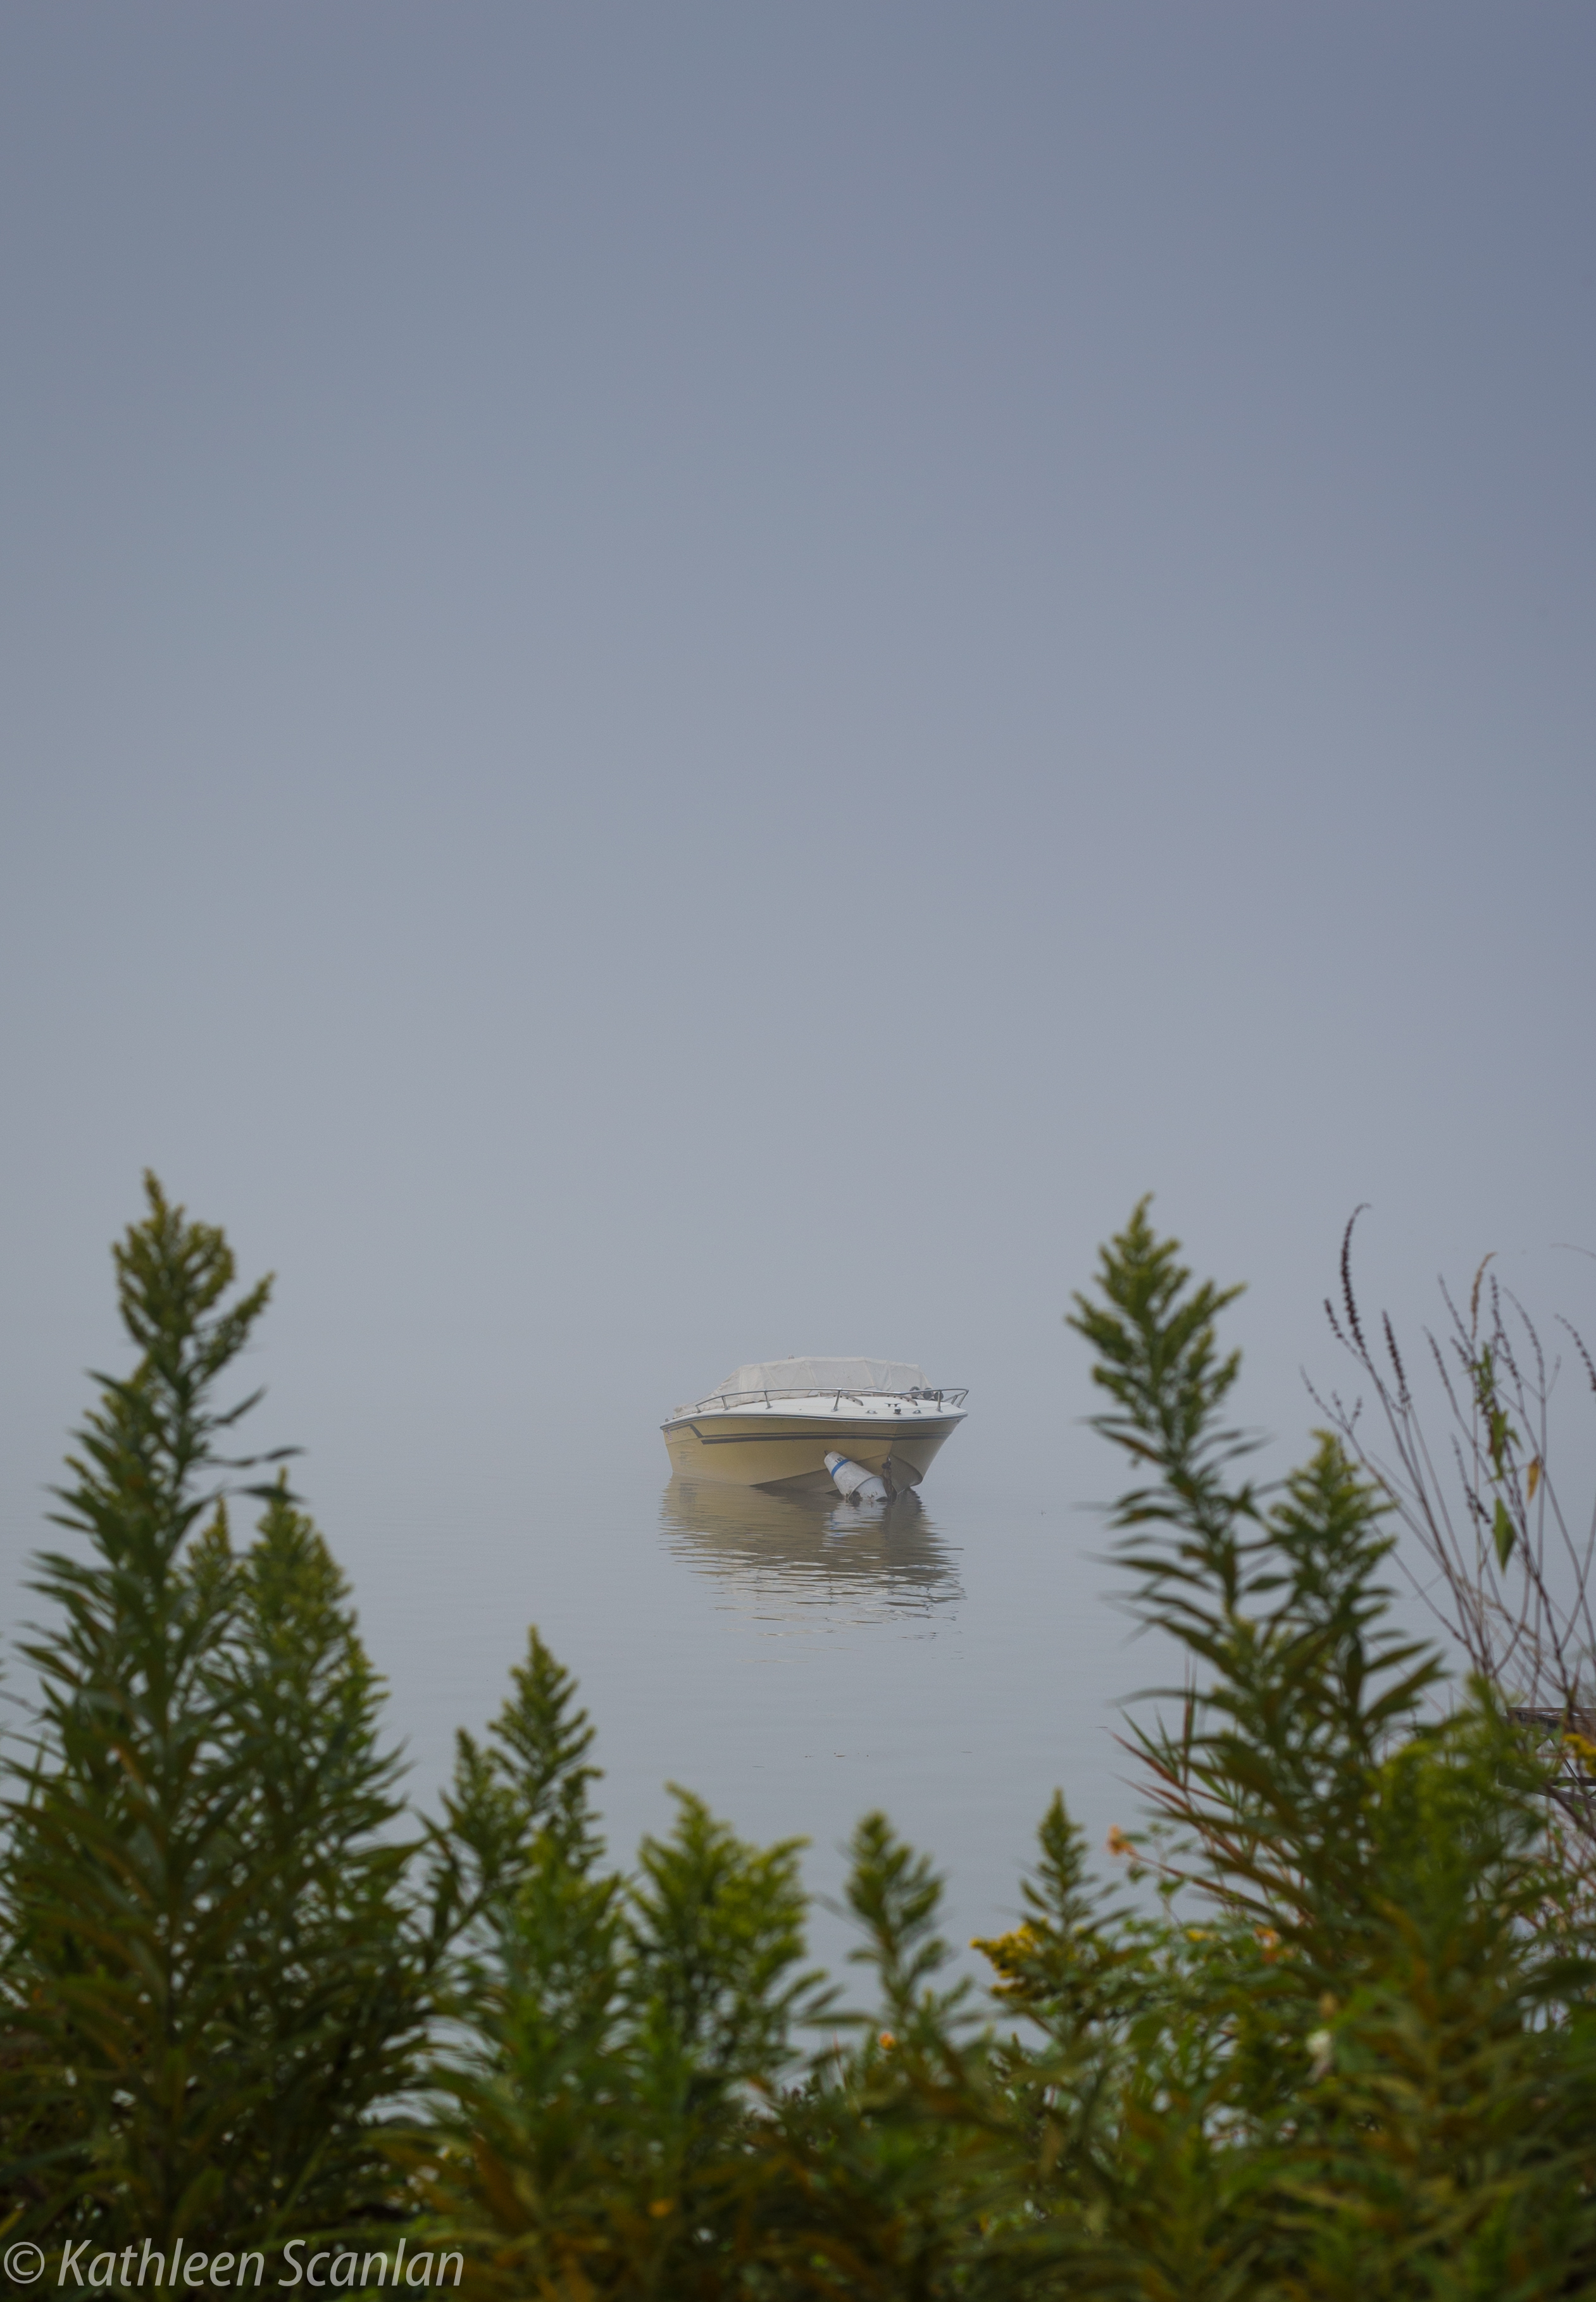
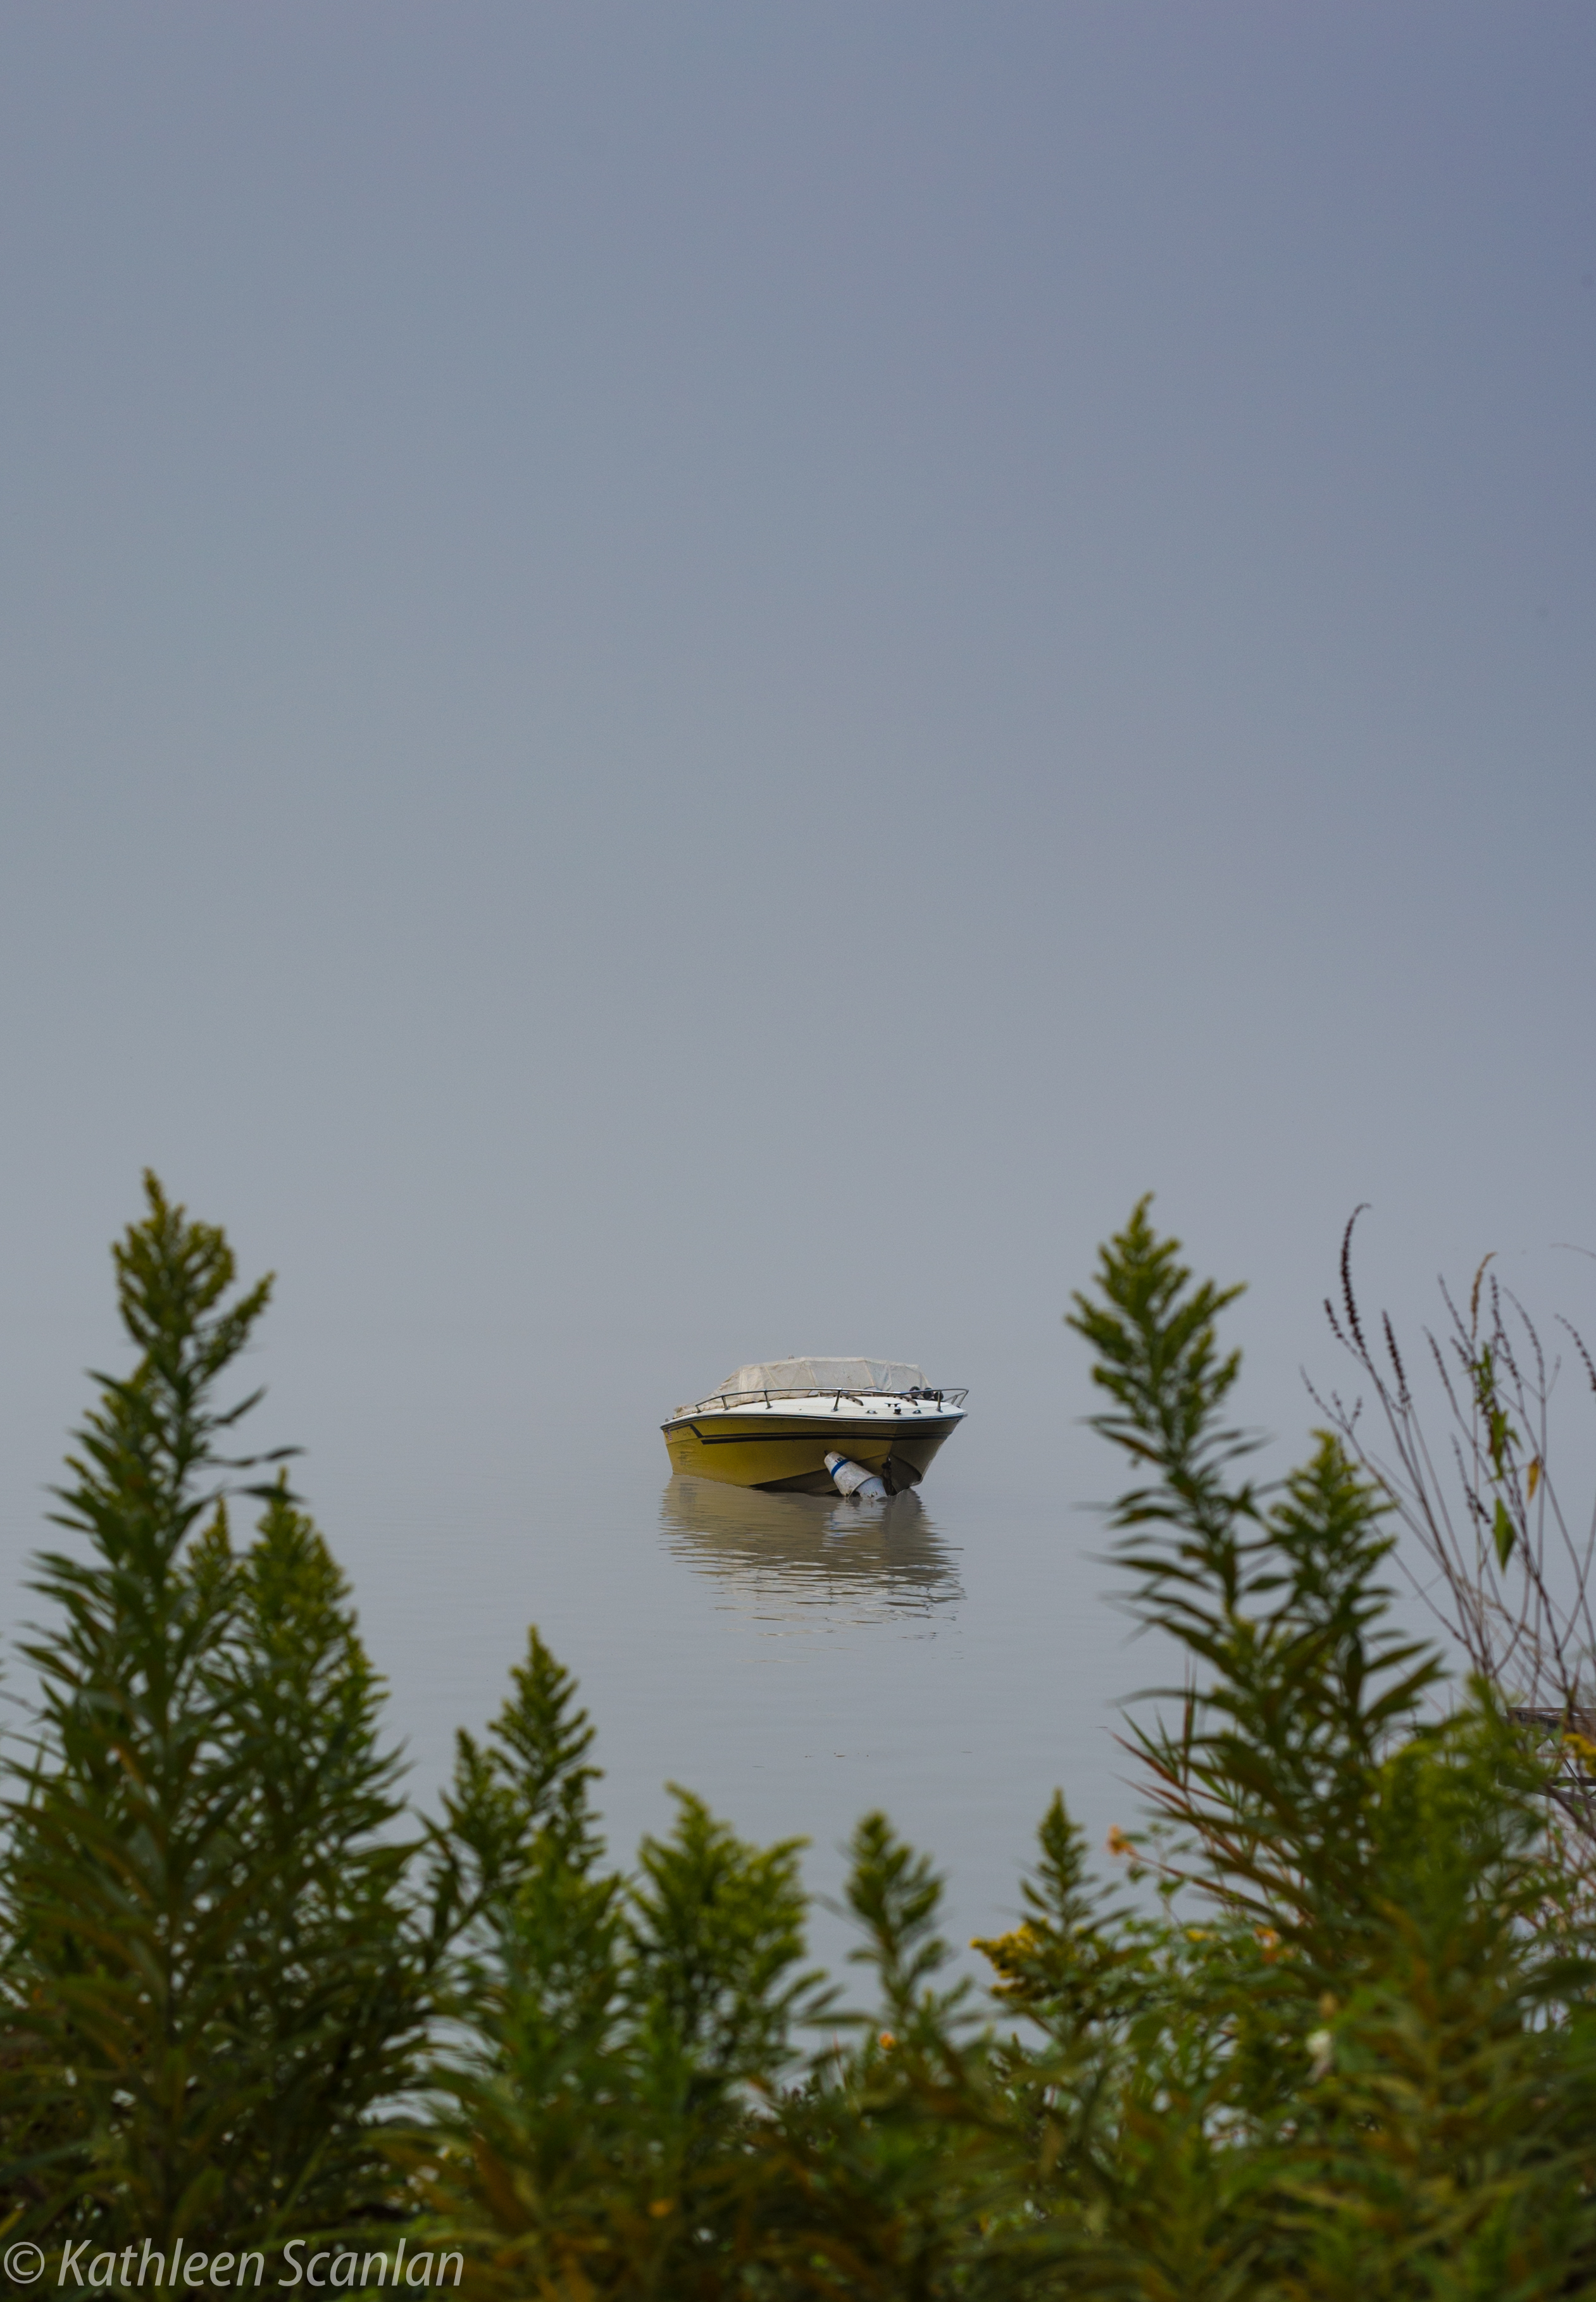
Below is an image I caught with my camera.  Using my manual mode, I made adjustments so that the sky wasn’t blown out and the foreground didn’t come out too dark.  To me, its a “blah” picture.  Not exactly what I actually saw that day.

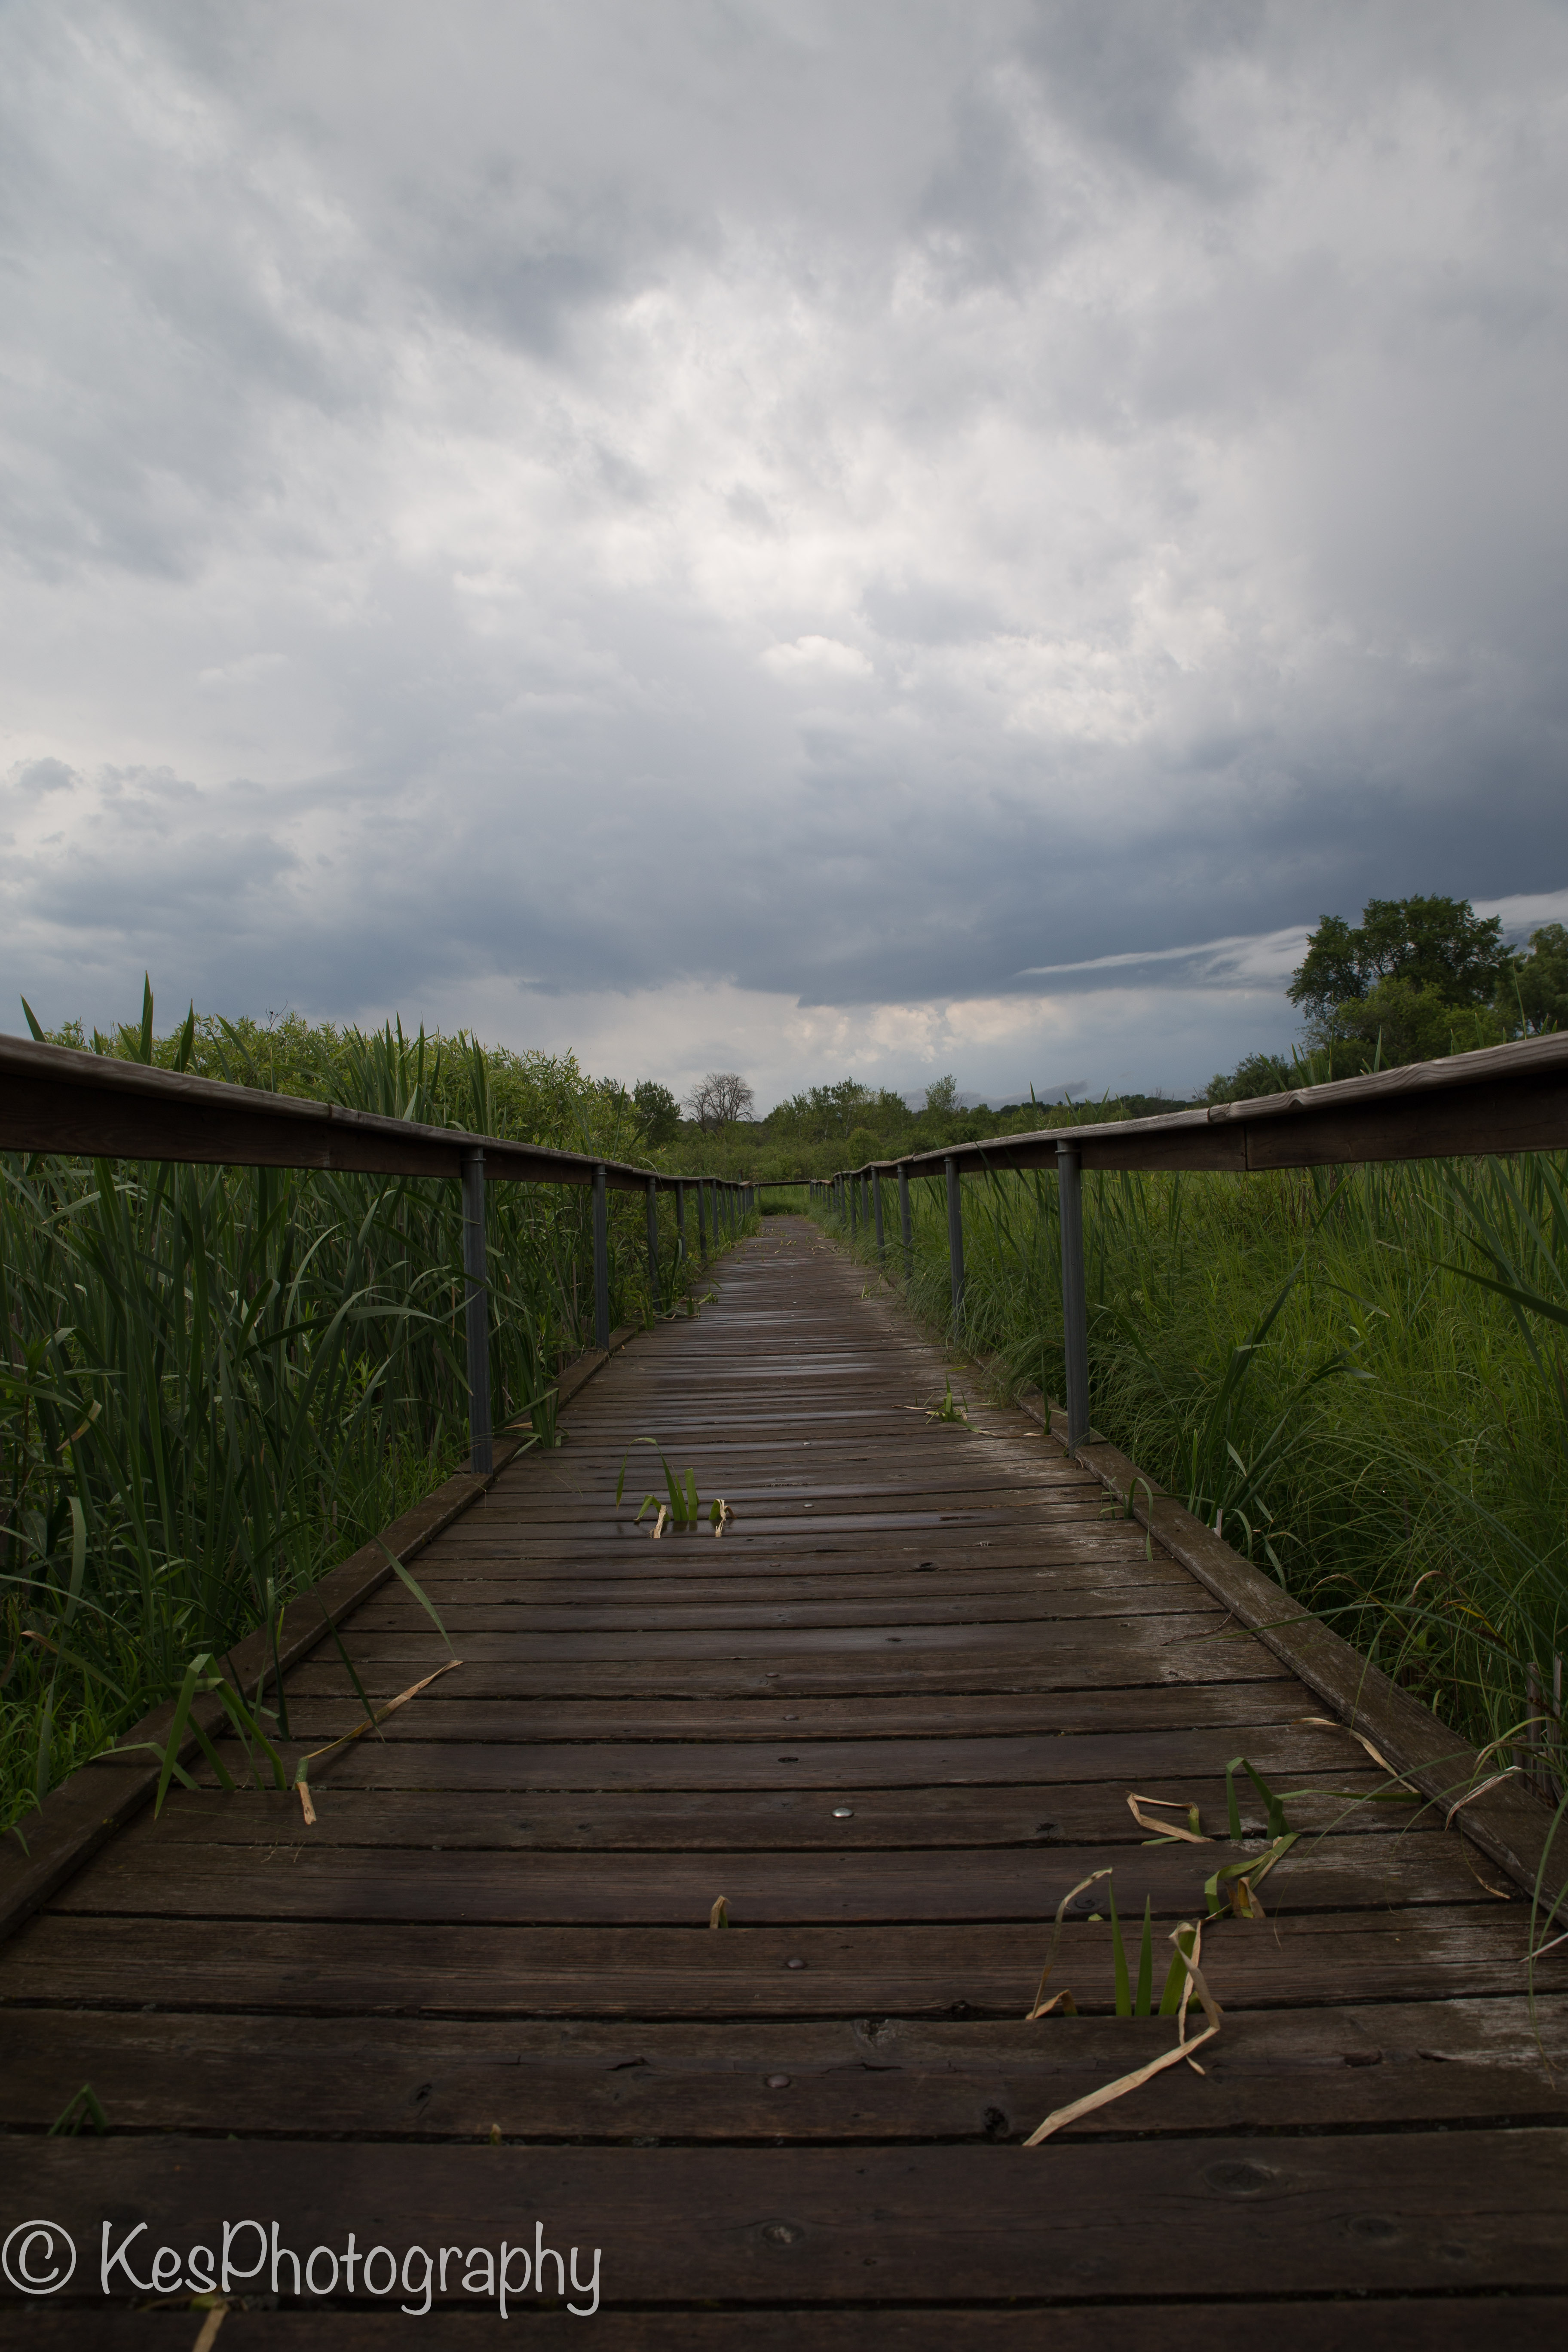
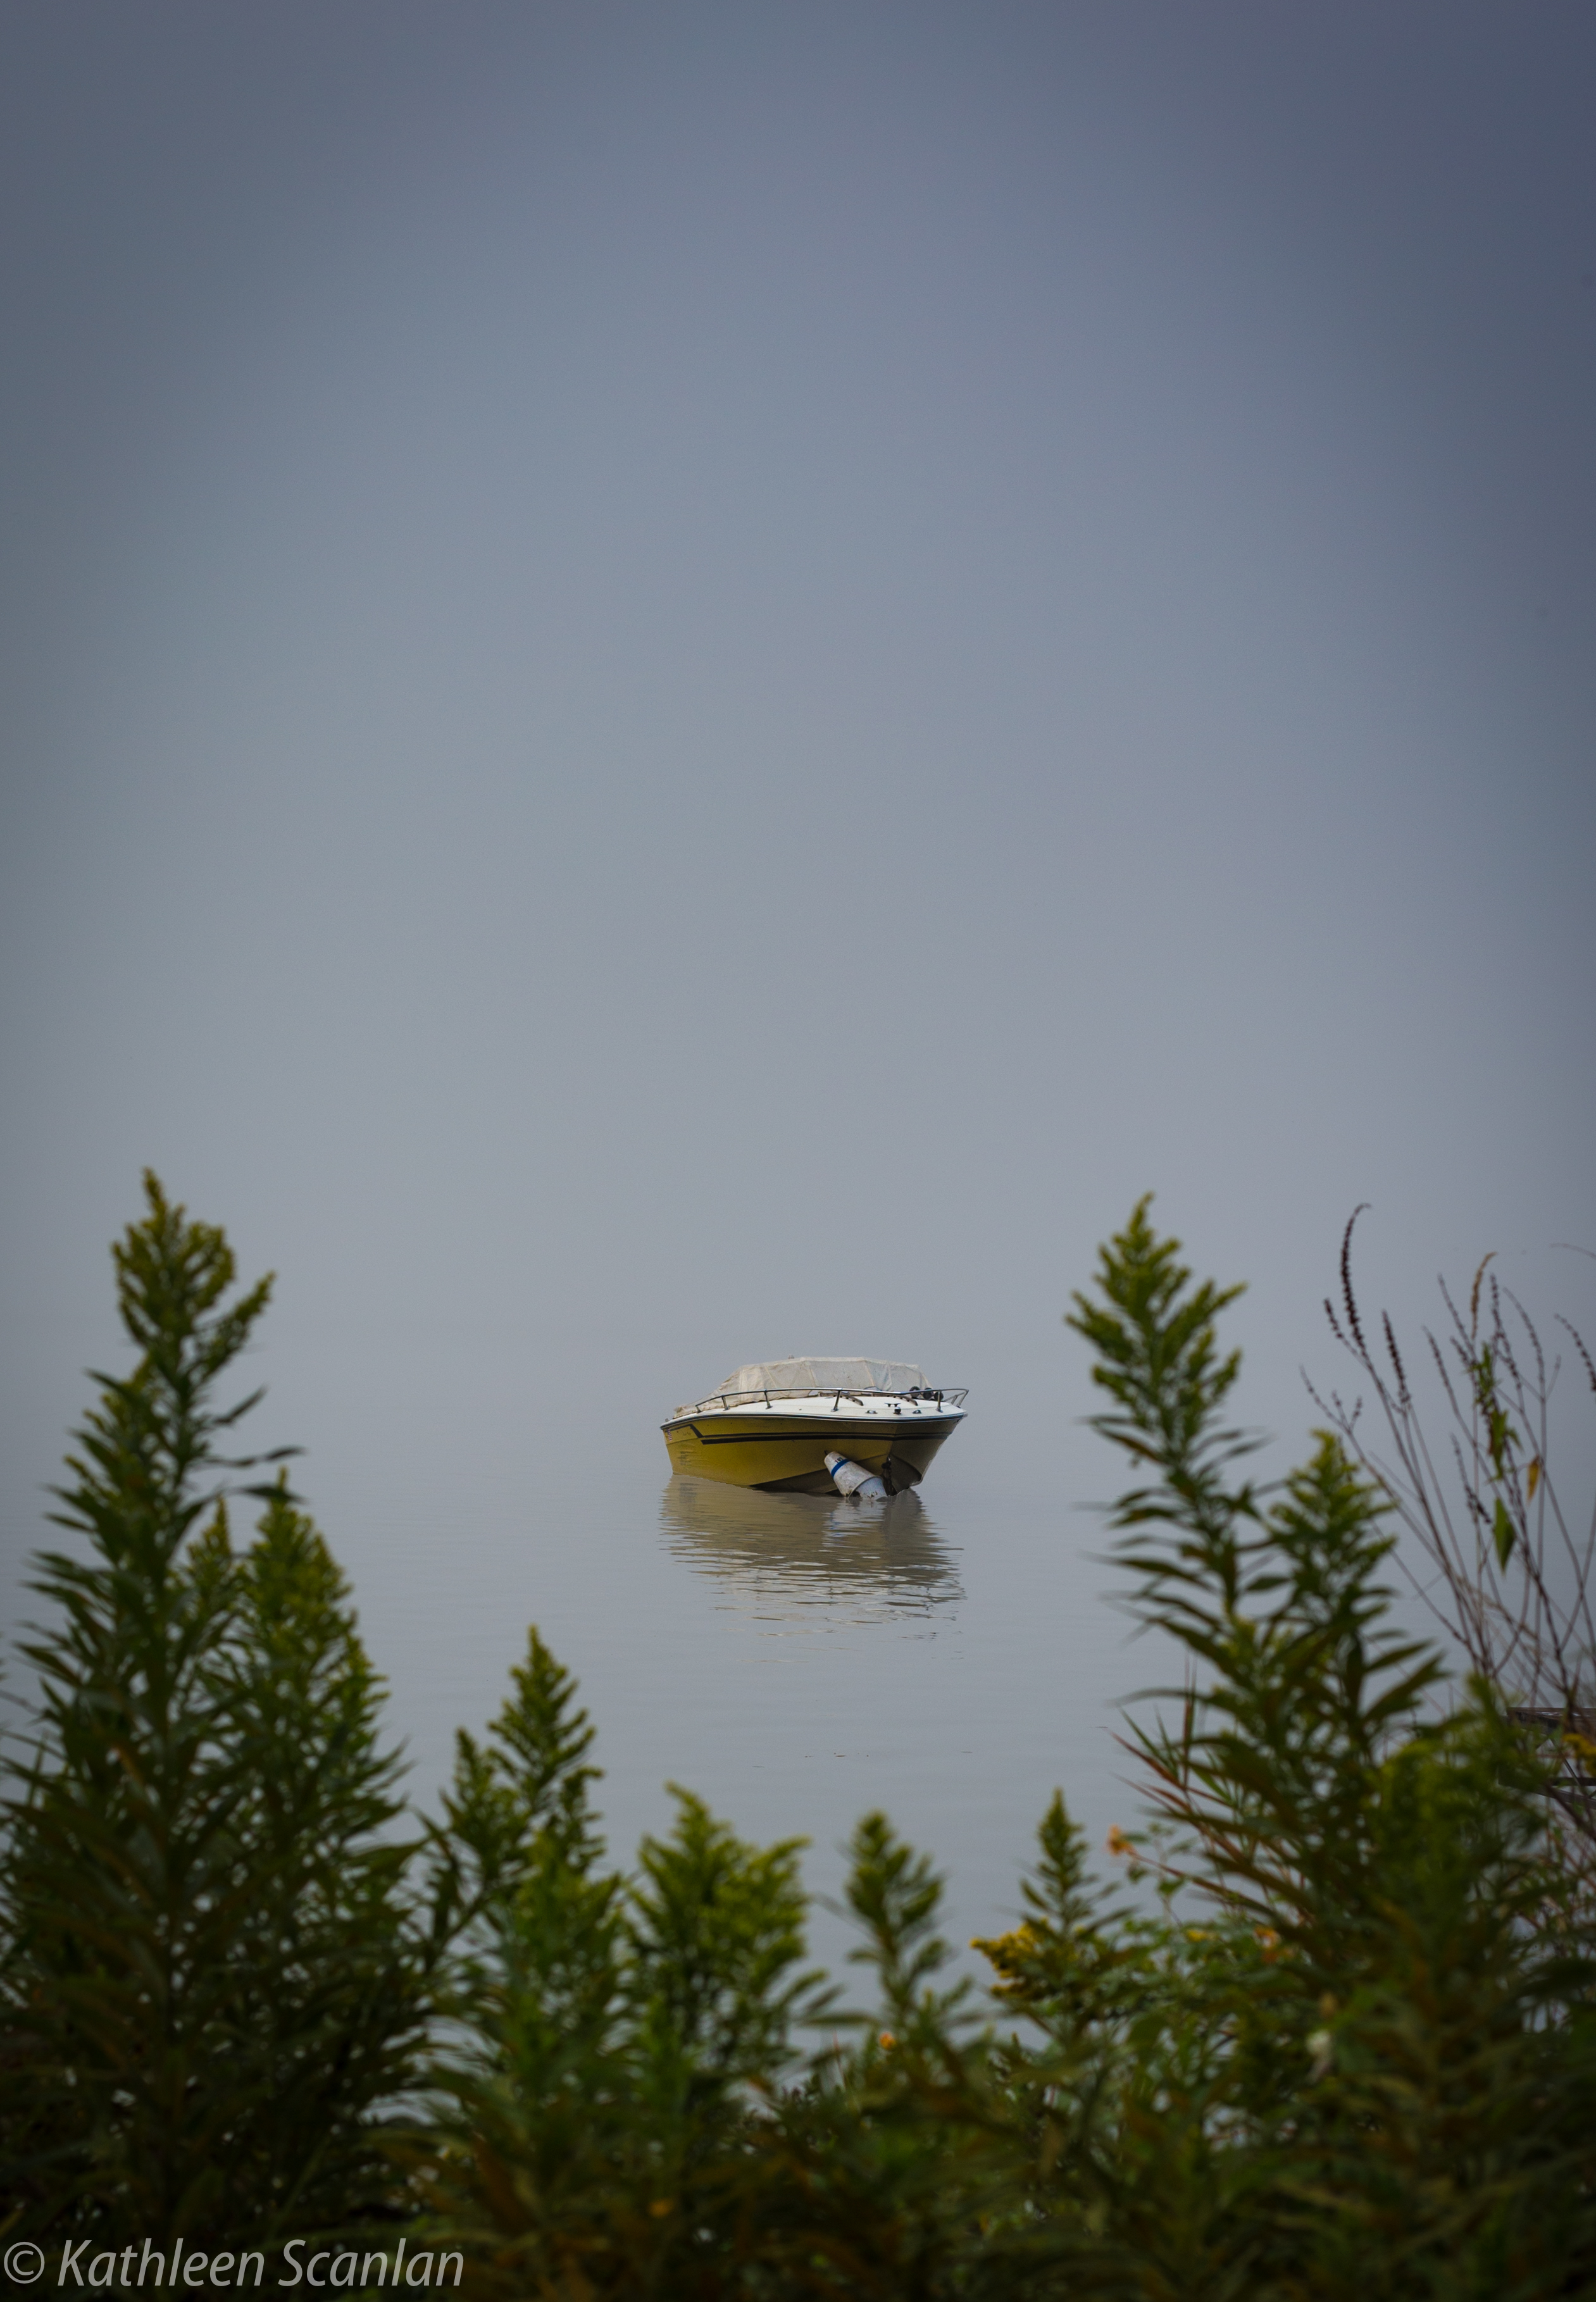
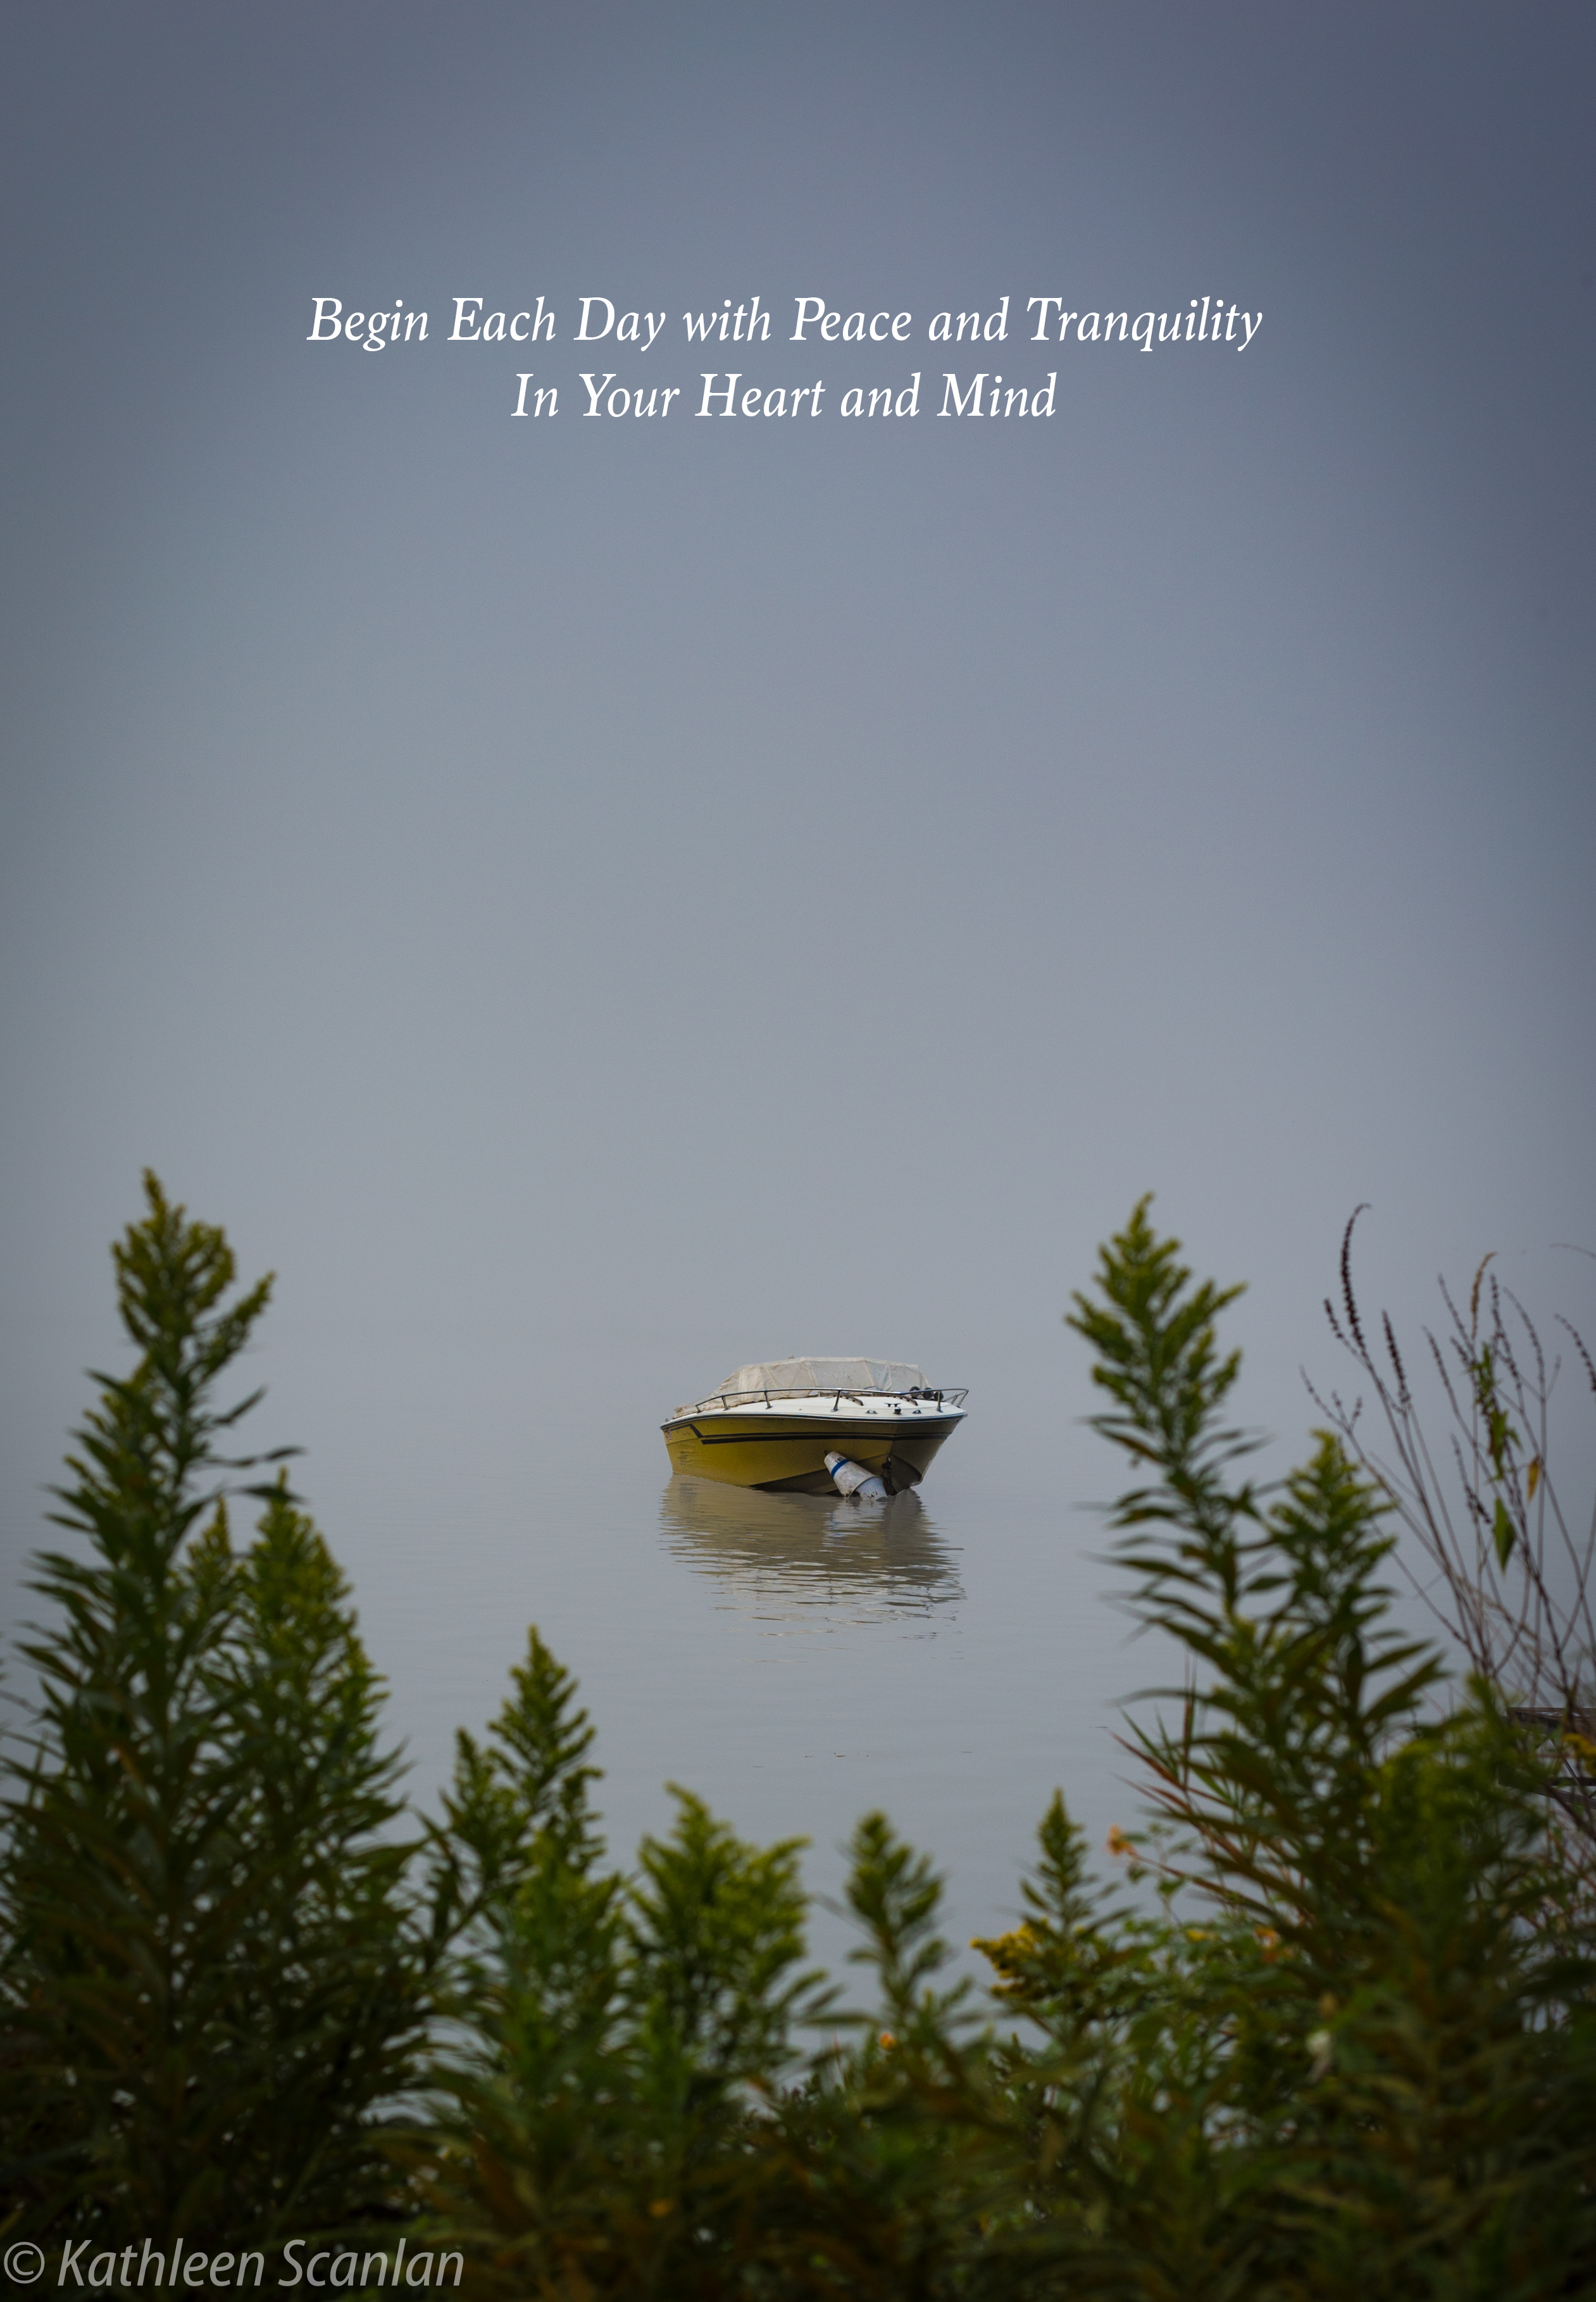
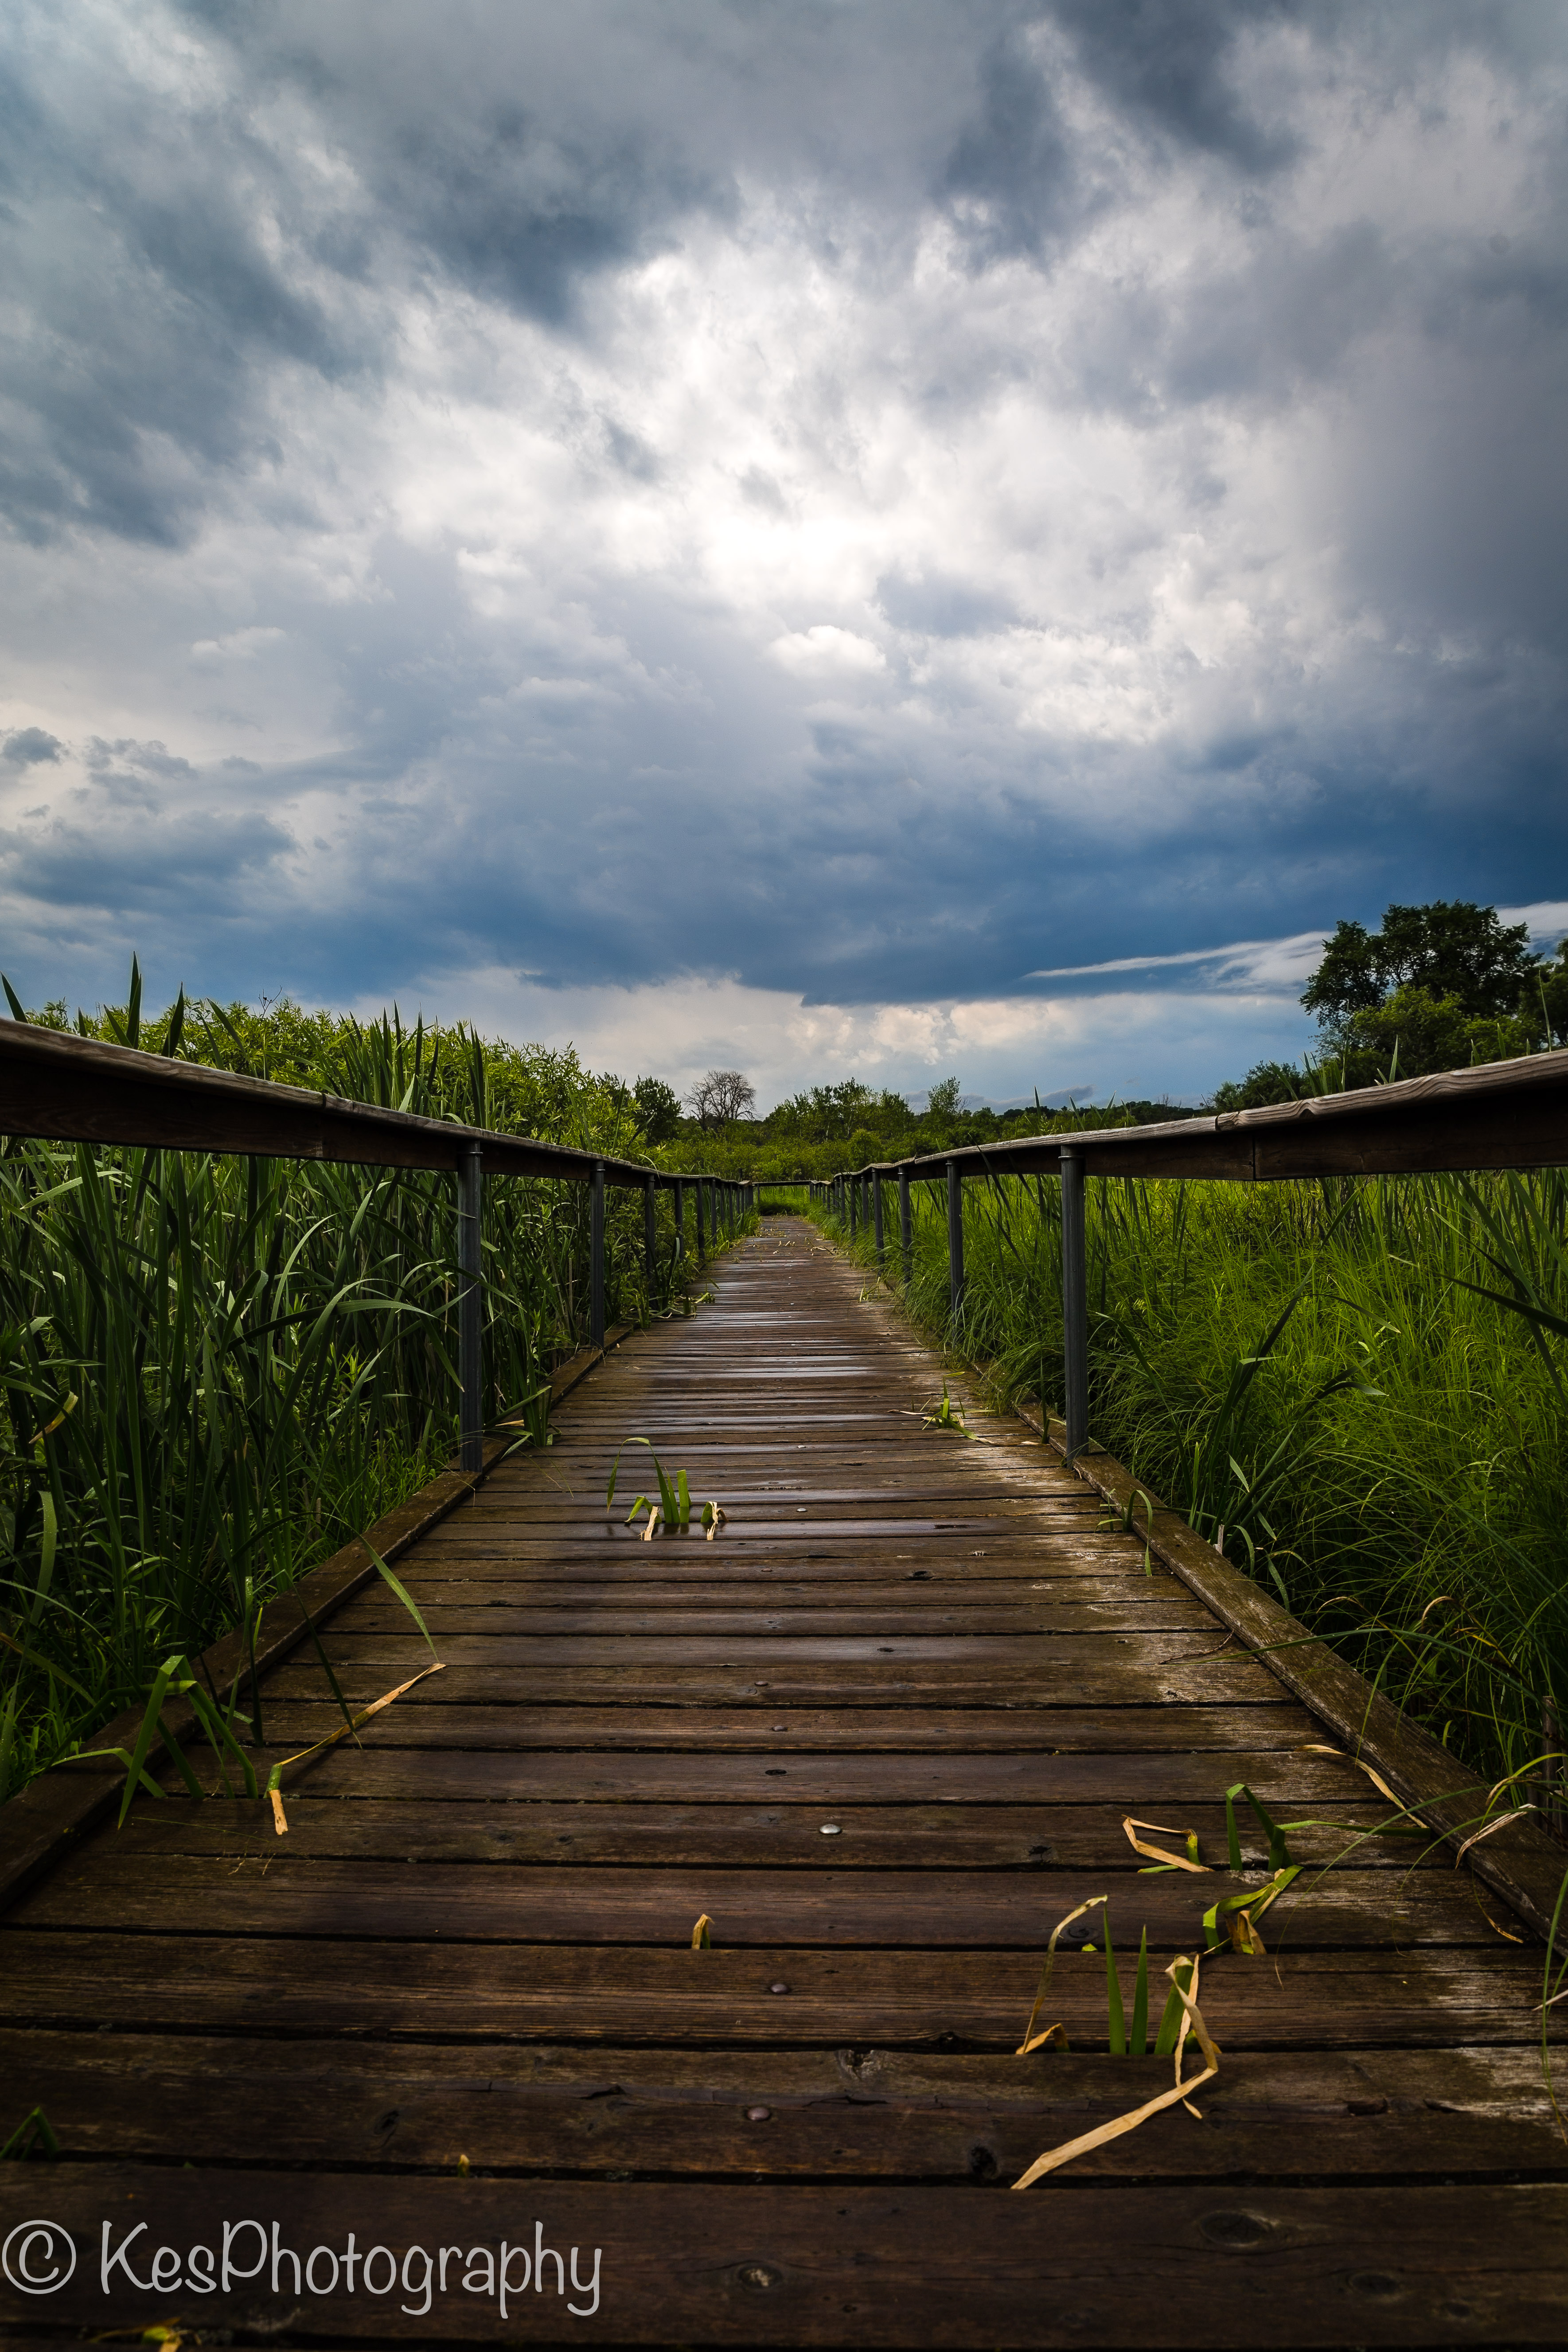
This is what I actually saw.  Had to do some post work to pull out the beautiful stormy sky, the saturated colors that pop on overcast days, and added a bit of clarity to pull out more definition of the pathway.  My final image is below.  In this one I can actually see the beauty and “feel” the storm rolling in.  Which one do you like?

You can shoot in auto mode and have beautiful images to show off.  But there is a limit to what the auto mode can do, too.  Have you ever shot an image and then when you downloaded it, the final image wasn’t quite right? The shadows were too deep or or the sky and clouds just were a white blur?  But, your eye didn’t see it that way when you initially took the shot.  Your brain saw the beautiful blue sky with the white, fluffy clouds passing by, and the colors were vibrant.  Our brains make the adjustment so quickly, we don’t even notice it.  Our eyes automatically make subtle changes so we “see” everything in its splendor.  So, until the camera has a “brain” that can catch up with the many variables the human eye adjusts for automatically, I can proudly say I will never be a “purist”.


Advertisement

Share this:

  • Email
  • Twitter
  • Facebook
  • Pinterest
  • LinkedIn

Like this:

Like Loading...

Posted by Kathleen Scanlan | Filed under Photography

≈ Leave a comment

Negative space…good or bad?

30 Friday Oct 2015

Posted by Kathleen Scanlan in Photography

≈ Leave a comment

Tags

creativity, Dehaze, Lightroom CC, negative space, Photography

The art world (which includes photography, by the way!) has a language of its own that those who are not part of this community might misinterpret. My favorite one is “negative space”. I have heard this phrase many times and wondered what it really was. Was it good to have in an image? After all, the word negative has, well, negative connotations! So it must not be a good thing, right?

Well, not exactly.  This term actually can be a very good thing.  To explain it simply, the phrase is interchangeable with “uncluttered” or “open space”.  The image below is one that has negative space.  It was shot early on a foggy morning when the other side of the lake was so bogged down with fog, it looked like the lonely boat was floating on air.  I used the bushes along the shoreline to anchor the bottom corners (and I like that “window” look as if the viewer is peering into the frame).  The emptiness from around midpoint to the top of the frame is considered negative space.

Early morning fog on Lake Como in the summer

Early morning fog on Lake Como in the summer

Why have empty or negative space in a shot?  There are several reasons that I can think of to have it in the frame.  The first one is obvious.  It focuses the eye on the main object, which in this case is the boat.  Another one could be that I may want to add text to the image.  Or maybe, even change the background in post work.

My settings on my Canon 6D were:  ISO 200, 50mm primary lens (meaning it was not a zoom), f/7.1 (Aperture), and Shutter speed of 1/100 sec.  I did not use a lens filter although one would have cleared up the haze in the image.  You can see that the fog/haze tends to soften the boat and makes it slightly indistinct.  But, since I knew I had a program that allowed me control over how much of the fog/haze I wanted to remove, I decided to go filter-free.

I use Lightroom 5CC by Adobe when I download and backup my images.  It affords me the opportunity to slightly change things and still have all the data filed together without creating a large file when I save those changes.  The image below is the same image as above, only with some slight post work.

Added some post work

Added some post work

In Lightroom, I used the “dehaze” tool located under the tab “Effects” to clear up a little bit of the fog so the boat would stand out a bit more.  It deepened the color and shadows of the bushes along the shore.  After completing that, I used a brush to clarify (another way to bring out detail and add a bit more definition) and increase color saturation to the boat.  The background and foreground were not affected.

The two last images show what you can do with negative space.  Again, all my initial work was completed in Lightroom.  I tend to add vignetting to my images to tighten the viewing area a bit.  For me, it looks better having the fog “contained” inside the image.  But you might not.  It really is up to you.  The second image has added text that I completed in Photoshop.

A little vignetting and the fog is contained!

A little vignetting and the fog is contained!

The final product!

The final product!

This is just one example of negative space and what you can do with it.  A shot of a leaf on a sidewalk, an object on an empty table, or a person walking down a wide, lonely road.   Negative space can be created in many different ways with just as many different results.

What would you do with it?  Take a picture of a child blowing out a candle with the background completely darkened and only her face, cake and candle visible?  a couple of children (or even just one all alone) playing in the sand on a beach with no one else around?  An apple on a wooden table at eye level in an orchard, with the orchard itself deep in the background and out of focus?  Get your creative juices flowing and give it a try.

So, the next time you take out your camera, consider adding negative space in your images.  Keep your composition clean and clear.  You might find that you like the uncluttered look!

Share this:

  • Email
  • Twitter
  • Facebook
  • Pinterest
  • LinkedIn

Like this:

Like Loading...

Light, Camera, Action!

24 Saturday Oct 2015

Posted by Kathleen Scanlan in Photography

≈ Leave a comment

Tags

halloween, Photography, Photography information

Photographers squat, bend, twist, and turn to capture that look or feel they want.  Basically, they move their body into all kinds of positions if necessary to get that one shot that will make their fortune! Those days are pretty much behind me, although I do try!  And, since I am not planning on making any kind of fortune with my camera and shoot because I love trying to capture the moment, my head tends to be on the swivel and my body, well, it creaks and groans if I insist it do something it doesn’t want to do!

The thrill for me is when I download my images and actually have ONE that is exactly what I was looking for; I am always excited and blown away!  Yep, I’m one of those…  Love it when everything just seems to go right!

Shot this image at the zoo!

Shot this image at the zoo!

With Halloween around the corner, I headed to the Lincoln Park Zoo in Chicago recently to see if the animals might be into the Halloween spirit.  Imagine my dismay when I found the illusive and rare pumpkin hidden in the gorilla cage.  It didn’t move and did have an expression of shock as if it didn’t think anyone would find it there (this is my story and I’m sticking to it!).

Since this shot was indoors, I set my Canon 6D on manual and the ISO to 1600 so I wouldn’t have to use a flash.  My speed was set at 50 and the f/stop was 5.6.  These settings allowed me to capture the natural light coming in through the roof skylight, darkened the background a bit, and made the focal point stand out from its setting.  It did take quite a few pictures ’til I finally had one that I liked.  Some were too dark, others were too light, some had the fence in focus (not sure how I did that!) and others just weren’t the right angle.  As I have mentioned before, don’t be afraid to take a lot of shots.  Just make sure you move around to get different views of your subject.  My focus was as sharp as I could get it by focusing through the fencing and on the “face” of the pumpkin.  You can actually see the blurred fencing in the man-made pond in the lower right corner.

This was my thought process:  Step 1.  Locate pumpkins at the zoo (didn’t expect to find them in the cages, tho).  Step 2.  Using natural light, give the image a bit of a Halloween “eerie” look.  Step 3.  Using the area around it, give a sense of location (in this case, I kept the blurred fencing in as well as the cement pond in the lower right corner).  Step 4.  Keep the background blurry and dark (that’s why the f/5.6 (aperture) and Shutter speed at 50.  Step 5.  Adjust the image after downloading

The finished product up above has little post work done.  Since I shot in in RAW and not jpeg, I had to adjust the contrast and hue just a little bit and added a bit more saturation to the pumpkin to liven up the color a bit.  This is standard type of post-work when using RAW imaging.  The original image comes out kind of blah but has captured all the data you need to work with it.   Can you get a good image with jpeg?  Yes you can. I just prefer to use RAW.  In a later blog, we’ll go over the differences between jpeg and RAW.

One thing to remember if you are going to adjust your Shutter speed.  Having a slow one tends to pick up any shake that might happen.  Even if you are a steady hand, if you use any setting lower than Shutter speed 40, odds are there will a bit of blurring of your subject unless you use a tripod.  I was very fortunate to be able to steady my camera with my body and the fencing for the 50 shutter speed.  More about this later.

So grab your camera and go find something that strikes your imagination.  Think about how you want to present it.  What mood do you want to convey?  What type of light (natural or flash) do you wish to use to bring out that idea in your head?  Where do you want your subject? (I put my pumpkin in the “jungle” by placing it father back in the image, blurring the foreground and what was behind the pumpkin.)  These are just some thought processes that you should have going on in your head before clicking that picture.  And you will see a great improvement in your final image.

Happy shooting until next time!  If you have questions, feel free to drop me a line.  I may not know all the answers but I have fun finding them!


Share this:

  • Email
  • Twitter
  • Facebook
  • Pinterest
  • LinkedIn

Like this:

Like Loading...

How Close Can You Go?

09 Friday Oct 2015

Posted by Kathleen Scanlan in Photography

≈ Leave a comment

Tags

Background blur, close-up, composition, focus, framing an image, Photo information, Photography, Photography information, zooming

This week, I thought that instead of just harping on some of the do’s and don’ts of composition, I would show you what I did with a Canon DSLR (Digital Single Lens Reflex).  This can also be accomplished with a point and shoot camera or even a cell phone one.

In the past, I have talked about thinking before shooting.  What do you want in the image?  What is your subject matter?  What “feel” do you want the viewer to have?  What’s the story?  The next step is to take the image, of course.  So….

I went for a walk on a  spring day.  It was slightly cloudy but the sun was coming through enough so that a flash was not required (I prefer non-flash images, anyway).  As I walked down my city sidewalk, my head was on a swivel, looking for that one image that yelled “spring has arrived!”  Most people tend to look toward the ground for fresh greenery just breaking ground after a long winter.  Me?  Well, there are days when getting low to the ground for a good shot just aren’t in the cards!  As it was this particular day…

So, heads up and full speed ahead.  Literally.  My eyes were on the trees.  Unfortunately, they didn’t seem to be quite ready for spring.  The branches appeared to be bare.  No apparent budding happening yet.  At least it seemed that way so I changed my though process (I mentioned this in a previous blog. Don’t be afraid to change your mind when out on a photo jaunt).  My new thought was to capture something that reflected the last of winter, like a brown leaf or a fallen acorn left over from last year.  And voila!  I found what looked like an old brown tree flower.

Brown Flower Seed

Brown Flower Seed

It looked so lonesome on the brown branch.  As if it had weathered the rough winter and still hung on for good measure.  The petals were still nice and crisp.  The last of the fall tree flowers.  That was my thought, anyway, when I looked at it.  (Pretty sure there are no such things as Fall tree flowers but my brain doesn’t always accept common sense when I am out with my camera!)

My thought process; focus on the forefront one and keep the farther one out of focus because the back one did not have the nice flowery look to it.  The petals seemed to be bent backward from the center (you can kind of see it in the picture) and the sun highlighted them a bit.  Also, I wanted the background very blurry because it was distracting with fencing and buildings.

Since I was using my DSLR on manual mode, I was able to play with a few settings (ISO, F-stop, and speed) to get what I wanted.  My lens was a 18-135mm zoomed to about 64mm.  We will get more into these numbers and how to play with them in another blog for those of you who have the ability to do it with your particular camera.  But most digital point and shoot cameras as well as telephone cameras have the ability to zoom, so you should be able to get somewhat the same effect as I did.

After finally settling on the image I “envisioned” as the final product, I downloaded it to my computer.  Mind you, I took about 30 images from different angles before I decided this is the one that captured what I wanted to say.  The digital age is a wonderful thing for photography!  No more wasting film or paying for processing of unwanted images!

Now it was time to check out all the details of the petals.  This is when I received my shock…this was not a flower at all.  It was a tree bud of sorts.  The so called-petals were protecting the seeds that the tree would eventually drop.  Since I tend to be very focused when I look through the viewfinder attempting to get the “framing” the way I want, it means sometimes I miss some of the finer details that the camera will pick up.  My focus was on the “flower” and not what it was hiding.

In the middle of the bud are several seeds.  You can seem them in the image below. I cropped the image so that you could see what I missed!   It’s probably one of my favorites of bud images as I have never seen one like it before or since. The bud almost seems to look like a face and is sticking its tongue out at me (that’s just my imagination running wild!).

Close-up of

Close-up of “flower”

As you can see, only the bud shows detail and the branches are out of focus.  All attention is on the “petals” and when you look closely, you see the seeds.  This is what I had talked about in previous blogs about composition.  When someone looks at your image, what draws them into it?  Or is it “flat”, meaning that what you see is what you get.  Had I simply shot this piece without zooming in, the background would have detracted from the bud.  Everything around it would have been as sharp as the bud and the person looking at the image would probably miss the seeds all together.

But with focusing and zooming in on my subject (and a few minor adjustments), the viewer now sees the detail and is drawn into the bud by the white petal that supports the seeds.  My subject matter stands out without anything to impede on the visual aspect of it.  The out-of-focus bud in the background lets the viewer know that this is some kind of tree or bush and not a ground flower.  I purposely placed the subject in the lower right quadrant of the frame so that the viewer would see it first and the lines (branches) lead into the image to show that there are other ones like it on this tree. It would have been nice to have had the sharper bud in the upper left quadrant with the “lines” leading to it but mother nature decided that was not to be.  Sometimes you just have to go with what you got. And yes, this is the actual color of the bud.  Definitely not a spring color!

So, the next time you head out with your camera, look around.  Try getting closer to your subject.  You never know just what your camera will capture.  The human eye adjusts and takes in tons of information.  It’s the camera that actually captures what you really see.  Grab your camera and go!

41.878114 -87.629798

Share this:

  • Email
  • Twitter
  • Facebook
  • Pinterest
  • LinkedIn

Like this:

Like Loading...

What Do You See?

18 Friday Sep 2015

Posted by Kathleen Scanlan in composition, Photography

≈ Leave a comment

There is so much information out there on the do’s and don’ts of composition that it can be quite overwhelming.  You might want to just put the camera down and forget about it. Don’t do it.  Don’t give up.  Pick up your camera (or phone camera) and just start shooting what YOU like.  This blog is one of several that will cover how I compose my images and my thought process when I shoot.

To me, its important that I capture my viewer’s attention and hold it for more than a  quick glance at my work. The image below is a farm field I shot on a cloudy day.  I wanted the farm in the distance to give the feel of the immense size of its fields.  Kind of boring.  Just a picture of farmland.
Farmland with little sun

As you can see, the cloud cover is not that thick, so I waited for the sun to poke through.  My thought was to highlight the field with the sun.  My second image came out OK but I still was not pleased.  Notice that I kept the same distance shot of the farm.

Farmland with foreground sun-0673

My third idea was to capture the sun as it hit somewhere about the middle of the field which is what you see below.  Still not real happy but it’s much better.

Farmland with middle sun-0675

I changed my mind about where I wanted the sun as the farm no longer seemed to be the focal point.  Waiting a bit longer, the sun finally hit the spot of the field I wanted.  The end result shows the immense size of the farmland, the impact of clouds on light shining on the fields (the darker foreground), and the sun highlighting the farm buildings in the distance.

Farmland with background sun-0670

This is what I envisioned.  The farm buildings as the focal point, the foreground with the muted colors of fall, and a tall plant on the left pointing towards the farm (that was an added bonus!).  So, go out there and start shooting.  Think about what you want your final product to be and don’t be afraid to change your mind in the middle of the shoot as long as it enhances your original vision!

Share this:

  • Email
  • Twitter
  • Facebook
  • Pinterest
  • LinkedIn

Like this:

Like Loading...

I’ve Finally Done It…!

12 Saturday Sep 2015

Posted by Kathleen Scanlan in Photography

≈ 3 Comments

Tags

Adobe, information, Lightroom, Lightroom CC, Photo information, photo work, Photography, Photography information, photos, Photoshop, Photoshop CC, post-work

Hi Everyone! I have finally entered the world of Blogging that everyone else has been in for years! Sometimes it takes time for those of us who were not born into the computer age to finally figure out how to use the “techy” stuff.

After I retired from my second love (where I had to make money to help raise a family), I jumped back into photography only to find myself completely perplexed and confused with all the new technology in this arena. Although I love photography and all that it entails, I was lost amid all the new digital cameras, post work programs, and information available on the internet. Half the time, I would read an article and still be lost as I don’t have a computer or techy mindset. All I wanted was an answer to a simple question in PLAIN english. And so, a blog is born…

In future blogs, which I plan on keeping it short and to the point (at least that’s the plan. Who wants to read long, run-on articles all the time?), I will share what I learn as I move on with my photography. Currently, I use both Photoshop CC and Lightroom CC for my filing and post-work (boy, were they a struggle to learn for me!).

I invite you to join me on my journey into the world of digital photography as I find my way around . Future blogs will contain helpful hints on composition, framing, and post -work, all written in a plain, down to earth language.

Well, here goes nothing…click!

41.878114 -87.629798

Share this:

  • Email
  • Twitter
  • Facebook
  • Pinterest
  • LinkedIn

Like this:

Like Loading...

Subscribe

  • Entries (RSS)
  • Comments (RSS)

Archives

  • March 2018
  • February 2018
  • December 2017
  • November 2017
  • October 2017
  • October 2015
  • September 2015

Categories

  • composition
  • Lightroom Tips
  • Photography
  • Uncategorized

Meta

  • Register
  • Log in

Blog at WordPress.com.

Privacy & Cookies: This site uses cookies. By continuing to use this website, you agree to their use.
To find out more, including how to control cookies, see here: Cookie Policy
  • Follow Following
    • KES Photography
    • Already have a WordPress.com account? Log in now.
    • KES Photography
    • Customize
    • Follow Following
    • Sign up
    • Log in
    • Report this content
    • View site in Reader
    • Manage subscriptions
    • Collapse this bar
 

Loading Comments...
 

    %d bloggers like this: