• KES Collections
  • About

KES Photography

~ Photographic Techniques Simplified

KES Photography

Tag Archives: post-work

Merging in Lightroom

14 Wednesday Mar 2018

Posted by Kathleen Scanlan in Lightroom Tips

≈ Leave a comment

Tags

creativity, images, information, Lightroom, Lightroom CC, Lightroom information, Lightroom merge, Merge, Merging images, Natural Light, Photography, Photography information, Photography postwork, post-work

When Lightroom was initially introduced to the market, it did not have the means to merge photos together. You had to use Photoshop to create a multi-layered image. Today, you can do that work right inside Lightroom with ease.

When shooting without a flash and with a bright background, the image in the front of the light will come out very dark. Now, no one wants the main image “in the dark”.  In the photos I am using for an example of bright backgrounds, I didn’t want to use a flash and didn’t want to lose the background either by opening up the stops to accommodate the image in the forefront.  So, I headed to Lightroom for a solution!

Orignal-7158.jpg

Lightroom now allows you to merge two or more images by compressing all the image data into one HDR image using very simple steps. Don’t be put off by “HDR”. In this instance of over-bright background, it is just a beginning point.  You can still adjust the final HDR product to your vision.

If you are steady-handed, shoot three or more photos with different speed stops without moving your focus.   For this article, I used my Canon 6D on a tripod and set my camera to shoot +/- one stop which means it will shoot the scene at a base stop that I set, then shoot ¾ higher (+3/4) and ¾ down (-3/4). I rarely do a full stop either way.  I set my ISO to 200 although I could have gone higher but didn’t want graininess in the images. Last but not least, my f-stop was set at 6.3.

Another way to shoot is to start at the high end of the speed you want to use and shut down a -1/2 stop for several more images.  The outcome will be the same.  This can also be done in reverse by adding +1/2 stop.

 The most important thing to remember when merging photos in Lightroom is that they are to be unprocessed. Another words do not do any post work on the images you plan on using.

Here are the two (yep, only two) steps for merging photos in Lightroom:

  1. Select the photos you wish to merge together. They have to be in consecutive order and have + or minus (-) speed settings for this to work (as mentioned above).  On a Mac, click on the first image and Cmd/Shift-click on the last image in Lightroom Classic CC to select the group of images you wish to use. I chose to use the three below.
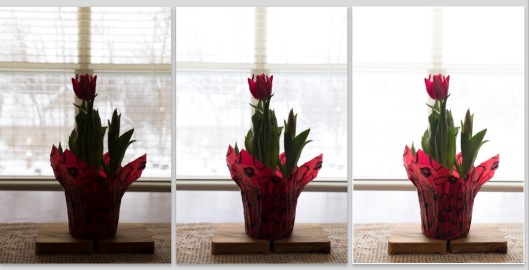
Screen Shot 2018-03-07 at 1.29.11 PM.jpg

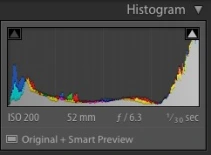
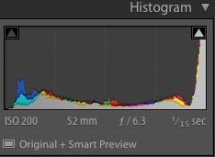
The histograms of each shot shows that I used shutter speeds of 1/80, 1/30, and 1/15 (the reason 1/60 is missing is because I deleted it before deciding to merge the images.  (Accidentally tripped over the tripod and the image was blurry!  Not a good idea…)
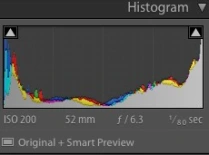
image 1.jpg Image 2.jpg Screen Shot 2018-03-07 at 1.32.16 PM.jpg

  1. Select Photo > Photo Merge > HDR. or press Ctrl+H.  Photo Merge is just below “Edit In”.
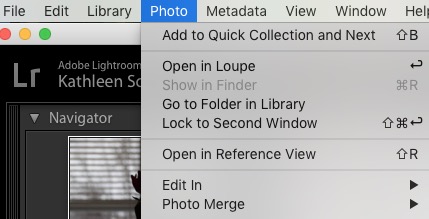
Step 2a.jpg

  1. Another box (HDR preview box) will pop open. This is where your final image will be created. You can select or deselect the following:

Auto Tone: Provides a good starting point for an evenly-toned merged image.  You can turn this off and see what happens.  Don’t panic if you see a dark image.  All the data is still there.  Lightroom just didn’t make adjusts; you can do this once  you accept the preview.
Auto Align: Useful if the images being merged have slight movement from shot to shot. Enable this option if the images were shot using a handheld camera. Enabling this option may not be necessary if the images were shot using a tripod.  The way to tell if you really need it is to zoom in on the image to see if everything aligns.

While you are making your choices, Lightroom is busy combining your chosen photos into one preview.
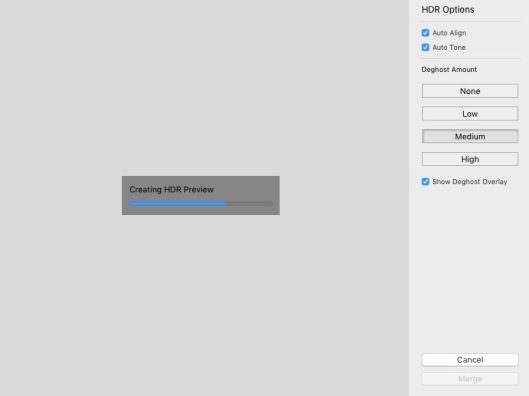
Screen Shot 2018-03-07 at 11.34.59 AM.jpg

After deciding on those two options, you can choose how much “deghosting” you may need.  This occurs when some transparency from the one image to the next occurs while merging.  For example: a bird or plane flying across the sky. Each frame will have the bird or plane in a different position. You might see the ghost of the bird or plane in each position in the final image.  Deghost will take care of this.

You can preview the effects of these settings right within the dialog box once the image downloads.   Play with it a bit so you understand how the options affect your final image.  Then, accept the image.

My final HDR image turned out to be a far cry from what I envisioned.  As you can see, it came out rather bright while the plant detail is nice and sharp.  A little too bright for me!  (Remember, earlier I stated that you can adjust your final HDR image.)

HDR 1-2.jpg


When you merge images in Lightroom, the program creates a new file/image. It combines all the data from the images you used to create the HDR image and compresses that date into one file. This means you can adjust the final image as if it was the original shot but with a whole lot more data to work with.  In my example, it probably had three times the image data since I used three images.


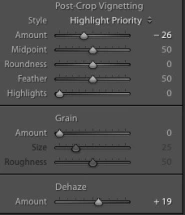
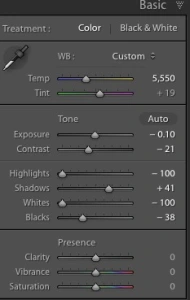
Because my final HDR image was not quite what I wanted (again, I could have turned Auto Tone off and made adjustments from that image), I decided to do some further adjustments in Lightroom on the new file/image.  Now the image looks much more natural and the details of the plant are still nice and sharp.  This, I like!

HDR Final-2.jpg

HDR 2a.jpgHDR 2.jpg


So the next time you want to play with your camera, try this neat trick out. Take several shots of one object, using several different speeds. Combined them in Lightroom and see what you can create. Have fun!

Advertisement

Share this:

  • Email
  • Twitter
  • Facebook
  • Pinterest
  • LinkedIn

Like this:

Like Loading...

Image

Is it Real or Post Work?

25 Wednesday Oct 2017

Tags

creativity, images, photo work, Photography, post-work, programs, pure photography

There is quite a conversation going on around the internet regarding photography and “pure” photography. Strange, but I never thought of it that way, even back in the “film” days. But apparently, with the onslaught of programs that help to enhance the original image from the camera, (some cameras have built in programs for that), the cosmic question has become “which is better? Pure photography (downloading and accepting whatever the camera captures, good or bad)? Or, images that have been adjusted in post work programs?  To me, the better question is; what is it that you want to accomplish with your image?

My favorite photographer is Ansel Adams.  You can still see his landscape photography everywhere.  He is known for capturing the landmarks and landscapes of the United States and is emulated by photographers worldwide.  Those who really don’t know him, believe his images are simply what he captured in camera.  The reality is, he did his best work in the darkroom.  Mr. Adams knew what he wanted his final products to look like and worked on his images until they reflected his “vision”.  His work, comprising of the National Parks of the United States, still capture the essence of the forests, rock formations, and the American landscape to this day.

I have read blogs as well as discussions on Facebook and other areas of the internet regarding this issue and people on both sides of the fence are very determined to convince each other that they are right. Just like politics…  I too would love to shoot a picture and have the camera do all the work for me (provided the camera knows exactly what I am striving for in the final product).  There are times when it is spot on but more times than not, the camera catches a dark area that my eye did not “see” or a glare which could have been be caused by the sun hitting the lens.  Or it reads the light as being too bright behind the subject matter because it registers all the light coming into the lens and adjusts for it, and the subject matter becomes a “shadow” in the image and the sky or background come out perfect with beautiful blue and white skies.

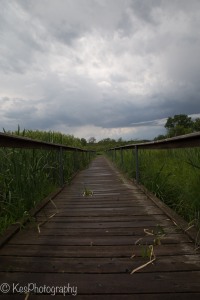
Below is an image I caught with my camera.  Using my manual mode, I made adjustments so that the sky wasn’t blown out and the foreground didn’t come out too dark.  To me, its a “blah” picture.  Not exactly what I actually saw that day.

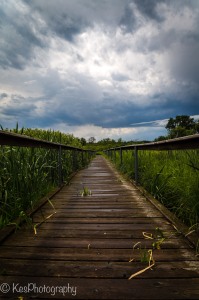
This is what I actually saw.  Had to do some post work to pull out the beautiful stormy sky, the saturated colors that pop on overcast days, and added a bit of clarity to pull out more definition of the pathway.  My final image is below.  In this one I can actually see the beauty and “feel” the storm rolling in.  Which one do you like?

You can shoot in auto mode and have beautiful images to show off.  But there is a limit to what the auto mode can do, too.  Have you ever shot an image and then when you downloaded it, the final image wasn’t quite right? The shadows were too deep or or the sky and clouds just were a white blur?  But, your eye didn’t see it that way when you initially took the shot.  Your brain saw the beautiful blue sky with the white, fluffy clouds passing by, and the colors were vibrant.  Our brains make the adjustment so quickly, we don’t even notice it.  Our eyes automatically make subtle changes so we “see” everything in its splendor.  So, until the camera has a “brain” that can catch up with the many variables the human eye adjusts for automatically, I can proudly say I will never be a “purist”.


Share this:

  • Email
  • Twitter
  • Facebook
  • Pinterest
  • LinkedIn

Like this:

Like Loading...

Posted by Kathleen Scanlan | Filed under Photography

≈ Leave a comment

I’ve Finally Done It…!

12 Saturday Sep 2015

Posted by Kathleen Scanlan in Photography

≈ 3 Comments

Tags

Adobe, information, Lightroom, Lightroom CC, Photo information, photo work, Photography, Photography information, photos, Photoshop, Photoshop CC, post-work

Hi Everyone! I have finally entered the world of Blogging that everyone else has been in for years! Sometimes it takes time for those of us who were not born into the computer age to finally figure out how to use the “techy” stuff.

After I retired from my second love (where I had to make money to help raise a family), I jumped back into photography only to find myself completely perplexed and confused with all the new technology in this arena. Although I love photography and all that it entails, I was lost amid all the new digital cameras, post work programs, and information available on the internet. Half the time, I would read an article and still be lost as I don’t have a computer or techy mindset. All I wanted was an answer to a simple question in PLAIN english. And so, a blog is born…

In future blogs, which I plan on keeping it short and to the point (at least that’s the plan. Who wants to read long, run-on articles all the time?), I will share what I learn as I move on with my photography. Currently, I use both Photoshop CC and Lightroom CC for my filing and post-work (boy, were they a struggle to learn for me!).

I invite you to join me on my journey into the world of digital photography as I find my way around . Future blogs will contain helpful hints on composition, framing, and post -work, all written in a plain, down to earth language.

Well, here goes nothing…click!

41.878114 -87.629798

Share this:

  • Email
  • Twitter
  • Facebook
  • Pinterest
  • LinkedIn

Like this:

Like Loading...

Subscribe

  • Entries (RSS)
  • Comments (RSS)

Archives

  • March 2018
  • February 2018
  • December 2017
  • November 2017
  • October 2017
  • October 2015
  • September 2015

Categories

  • composition
  • Lightroom Tips
  • Photography
  • Uncategorized

Meta

  • Register
  • Log in

Blog at WordPress.com.

Privacy & Cookies: This site uses cookies. By continuing to use this website, you agree to their use.
To find out more, including how to control cookies, see here: Cookie Policy
  • Follow Following
    • KES Photography
    • Already have a WordPress.com account? Log in now.
    • KES Photography
    • Customize
    • Follow Following
    • Sign up
    • Log in
    • Report this content
    • View site in Reader
    • Manage subscriptions
    • Collapse this bar
 

Loading Comments...
 

    %d bloggers like this: